FINAL CODE AND FINAL THOUGHTS
This will be our final code (we just take the code for adding a single label in addition to the two standard of Elegant and Divi):
.single-post {
--elegantColor: rgba(249,91,255,0.95);
--hostColor: rgba(150,5,0,0.95);
--diviColor: rgba(121,0,214,0.95);
}
.sideAdsContainer {
margin-top: 2vh;
max-height: 30vh;
display: flex;
flex-flow: column nowrap;
}
.arrowed:after {
content: ""; position: absolute; bottom: -3em; left: 6em; border-width: 2.5em 2.2em 0; border-style: double; border-color: lightgray transparent;
border-top-width: 1.5em;
opacity: .5;
}
.sideLabels {
justify-content: space-around;
width: 100%;
text-align: center;
margin-top: 2vh;
padding: 2%;
background-image:linear-gradient( transparent 90% , transparent 10% );
background-size: 0;
background-repeat: no-repeat;
border: solid 1px black;
border-left: none;
border-right: none;
color: black;
}
.clicked{
background-image: linear-gradient( var(--elegantColor, violet) 100%, transparent 0%);
background-size: 100% 100%;
transition: all 1.5s;
color: white;
}
.elegantLabel {
border-color: var(--elegantColor, violet);
}
.diviLabel {
border-color: var(--diviColor, purple);
}
.supporthostLabel {
border-color: var(--hostColor, red);
}
.sideLabels:hover {
cursor: pointer;
}
.display {
display: block !important;
}
.single-post .et_bloom_flyin_left, .page-id-1277 .et_bloom_flyin_left {
padding-right: 0 !important;
left: 5px !important;
bottom: 1vh !important;
}
.single-post .justImageAds .et_bloom_form_container, .page-id-1277 .justImageAds .et_bloom_form_container {
-webkit-transform: perspective(500px) rotateX(45deg);
-moz-transform: perspective(500px) rotateX(45deg);
-ms-transform: perspective(500px) rotateX(45deg);
-o-transform: perspective(500px) rotateX(45deg);
transform: perspective(500px) rotateX(45deg);
box-shadow: 0 29px 72px -21px #27005e !important;
max-width: 200px !important;
display: none;
max-height: 200px !important;
border: solid 7px transparent !important;
transition: all 1s;
}
.single-post .justImageAds .et_bloom_form_container:hover, .page-id-1277 .justImageAds .et_bloom_form_container:hover {
transform: rotateX(0deg) scale(1);
transition: all 1s;
}
.single-post .justImageAds .et_bloom_close_button, .single-post .justImageAds .et_bloom_form_content, .single-post .justImageAds .et_bloom_form_text, .page-id-1277 .justImageAds .et_bloom_close_button, .page-id-1277 .justImageAds .et_bloom_form_content, .page-id-1277 .justImageAds .et_bloom_form_text { display: none !important; }
.single-post .et_bloom_form_container div, .page-id-1277 .et_bloom_form_container div { padding: 0 !important;}
.single-post .justImageAds .et_bloom_header_outer img, .page-id-1277 .justImageAds .et_bloom_header_outer img {transition: all 1s; padding: 0 !important;}
.single-post .elegantAd .et_bloom_form_container, .page-id-1277 .elegantAd .et_bloom_form_container {
border-color: var(--elegantColor, violet) !important;
}
.single-post .supporthostAd .et_bloom_form_container {
border-color: var(--hostColor, red) !important;
}
.single-post .diviAd .et_bloom_form_container {
border-color: var(--diviColor, purple) !important;
}
/* jQuery to add href to the banners */
<script>
/*ADD HREF ATTRIBUTE TO BANNER IMG*/
jQuery(document).ready(function() {
var banner5 = jQuery('.et_bloom_optin_5'); var banner7 = jQuery('.et_bloom_optin_7');
var banner9 = jQuery('.et_bloom_optin_9');
banner5.wrap("<a href='https://my.supporthost.net/aff.php?aff=107'></a>");
banner7.wrap("<a href='https://www.elegantthemes.com/affiliates/idevaffiliate.php?id=30218'></a>");
banner9.wrap("<a href='https://www.elegantthemes.com/affiliates/idevaffiliate.php?id=30218'></a>");
banner5.addClass("supporthostAd justImageAds");
banner7.addClass("elegantAd justImageAds");
banner9.addClass("diviAd justImageAds");
});
</script>
/* jQuery to add the labels */
<script type="text/javascript">
/* Add Ad Labels */
jQuery(document).ready(function(){
var post = jQuery("#et-main-area #main-content #left-area article.type-post");
post.each(function(){
if (jQuery("body").hasClass("single-post") ) {
var elegantLabel = ".elegantLabel";
jQuery(".et_search_outer").append("<div class='sideAdsContainer'><div class='sideLabels elegantLabel arrowed'><p>Elegant Themes</p></div><div class='sideLabels diviLabel'><p>Divi</p></div></div>");
if (post.hasClass("tag-tools") ) {
jQuery("<div class='sideLabels supporthostLabel'><p>Supporthost</p></div>").insertAfter(elegantLabel);
}
}
});
});
</script>
/* jQuery to link banner change and color animation on click event */
<script type="text/javascript">
jQuery(document).ready(function(){
 // ADD CLASS 'display' TO ELEGANT BANNER
 jQuery(".elegantAd .et_bloom_form_container").addClass("display");
// ADD CLASS 'clicked' TO ELEGANT LABEL
jQuery(".elegantLabel").addClass("clicked");
// WHEN CLICK ON A LABEL
jQuery(".sideLabels").on("click", function(){
 var borderColor = jQuery(this).css("borderColor");// create a var in which we retrieve and store the border color of the label jQuery(this).addClass("clicked"); // add to the label clicked the class 'clicked'
 jQuery(this).siblings().removeClass("clicked").removeAttr("style"); // remove both the class 'clicked' and the 'style' attr from every label that is not the clicked one
// IF THE LABEL HAS CLASS 'clicked'
if (jQuery(".sideLabels").hasClass("clicked")) {
jQuery(this).css({ // add css to animate the background color with the same color of the border and text color to white
"background-image": "linear-gradient(" + borderColor + " 100%, transparent 0% )",
"background-size": "100% 100%",
"transition": "all 1.5s",
"color": "white"
});
}
});
var ad = jQuery(".et_bloom_form_container");
var adFormContainer = "et_bloom_form_container";
var adContainer = "#main-header .et_search_outer .sideAdsContainer";
jQuery(adContainer + " .supporthostLabel").on("click", function() {
ad.removeClass("display");
jQuery(".supporthostAd ." + adFormContainer).addClass("display");
});
jQuery(adContainer + " .elegantLabel").on("click", function() {
ad.removeClass("display");
jQuery(".elegantAd ." + adFormContainer).addClass("display");
});
jQuery(adContainer + " .diviLabel").on("click", function() {
ad.removeClass("display");
jQuery(".diviAd ." + adFormContainer).addClass("display");
});
});
</script>
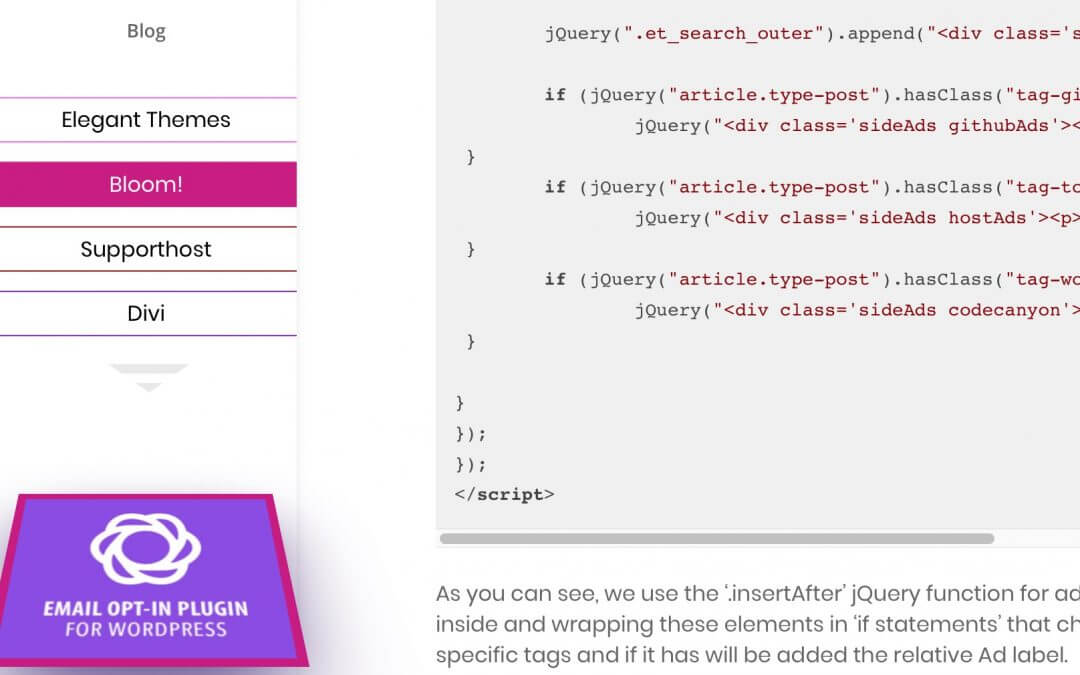
There’s a lot but our final result is exactly as we had imagined it. Now the banner shown on the bottom left is indicated in the color of the corresponding label bar and changing it the label bar will have a progressing effect till the background will occupy all the label space.
This Ads system remain pretty simple and couldn’t fit everyone’s needs but i hope it could be useful for someone and give cues to others. See you next post here on Howidivit!