
Hi, everyone, today we want to complete our Divi 3.1 Series by finishing our ‘i Divi Advanced Audio’ plugin.
We cover in order 1) How to fix some issues about the rendering on Visual Builder when you are customizing an existing Divi module; 2) How to style your module in Standard and Visual builder in order to make it recognizable; 3) How to export your Divi plugin and be ready for sharing/selling it. So, let’s get started!
SOME ISSUES ON VISUAL BUILDER
In the last Series post we gave a peek on how and eventually why we can customize an existing Divi module instead of creating a new one. This way, however, does arise some display issues when on Visual Builder linked with the adding Css styles to our module (like widths, margins, colors etc.).
The easiest way (already updated in the code of the last post) to avoid these problems is to add few lines of code in our render function (just above the check for the $render_slug) to check if the $output is an array and return it.
However, this is a shortcut. A better and more standardized way to get our goal and get around the problem is to rewrite all our Css styles in the ‘render’ function using the ‘ET_Builder_Element::set_styles()’ Divi function:
ANOTHER LITTLE BUG
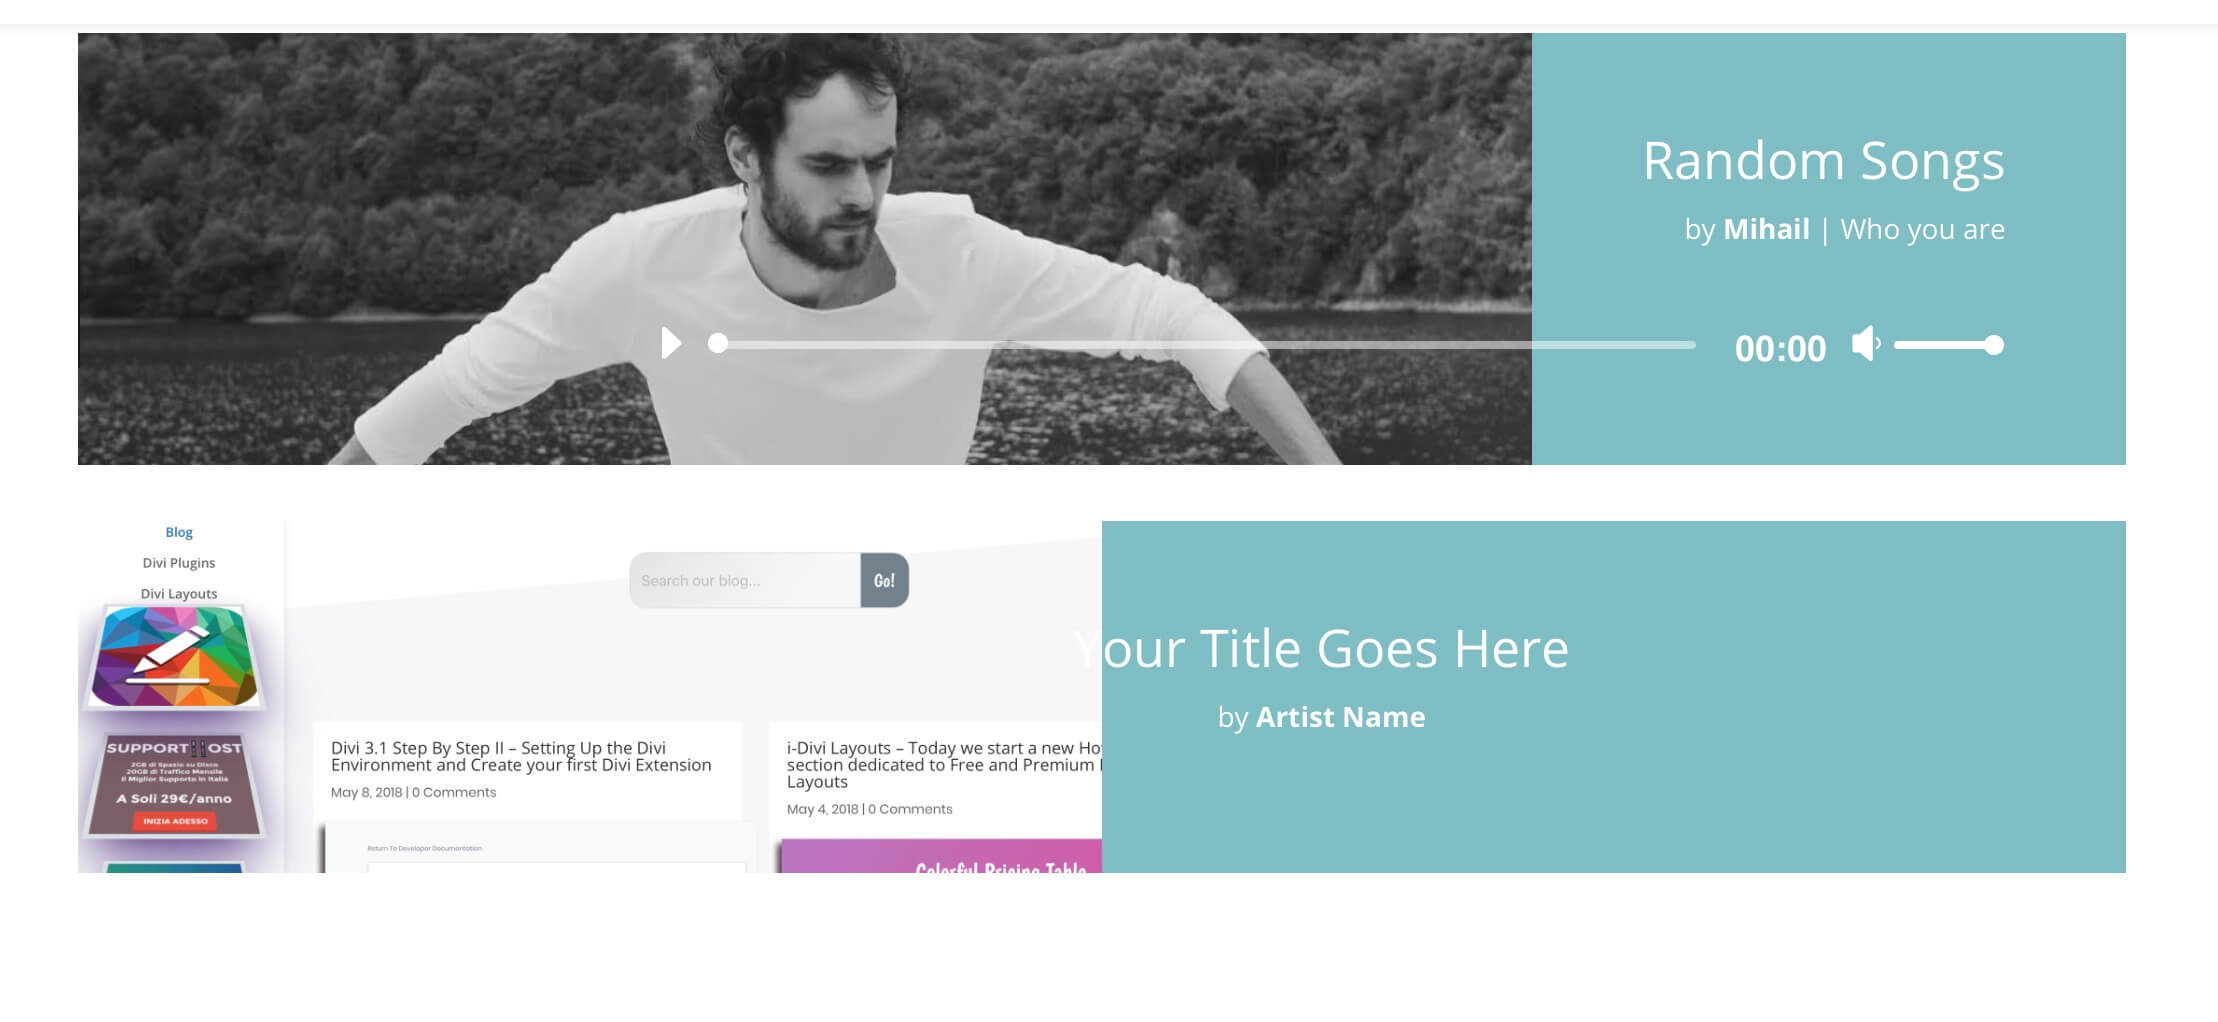
Another little issue in which we occur concerns the targeting of the audio module. When we apply our Css style – if we add more than one audio module – we see the style affects all the Audio modules: so, for example if we apply a feature image custom width of 50% we will find that every Audio module in the page will have this image width!
It happens that because in our ‘ET_Builder_Element::set_style()’ we specify for ‘selector’ property the value ‘.et_pb_audio_cover_art’; it lacks the more specific class referring to that specific module that is in our case ‘.et_pb_audio_0’. In order to add this particular class that Divi automatically adds to every module we just have to include in our ‘selector’ value ‘%%order_class%%’.
Doing this way our Css style will apply just to the module we have modified and not to all Audio modules; we can now set for our first Audio module an image width of 70% and the Css style will apply to the selector ‘.et_pb_audio_0 .et_pb_audio_cover_art’ and then set a second Audio module with an image width property of 50% and it will apply just to the ‘.et_pb_audio_1 .et_pb_audio_cover_art’.
FINAL CONSIDERATIONS ON CUSTOMIZING MODULES
Ok! Now our Css styles are properly applied to our module. Remains the main issue with working this way: at the moment you can’t see the changes on Visual Builder and is far complicated to fix it. The Divi team, however, should add soon the documentation about the customization of existing modules; we will keep on track with them and let you know.
STYLING OUR CUSTOM MODULES
Either you choose to create a new custom module or customizing an existing one is highly recommended to style a little (do not overdo it!) your custom modules in the builder in order to make them recognizable and standing out among all the Divi Modules.
We can do it just adding some Css rules. For styling your modules in the backend builder you can add this css in your main ‘style.css’ file:
NOTE: If you created the plugin with the ‘Create Divi Extension’ tool remember to place your css files in the ‘Styles’ folder!
A little bit different if you want to style your modules in the Visual Builder; in this case you have to add your css in the ‘/style.css’ file that the ‘Create Divi Extension’ tool will add automatically in the /modules/[your-custom-module] path of your plugin (remember you can add in this file also Css for existing Divi modules like our Audio one!):
SAVE AND EXPORT OUR DIVI PLUGIN
Once you finished your Divi plugin you just have to close your terminal (we still have the terminal window with the ‘yarn start’ command running, remember?) and re-open it, change directory to the plugin folder and run the command ‘yarn build’ or ‘yarn zip’.
The first one will optimize your plugin to be ready for production adding some minified css and javascript files, while with the second command in addition to the optimization for production you will also get a zipped file of your plugin.
NOTE: If you opt for using ‘yarn build’ you can also zip manually your plugin folder excluding the following files:
- /node_modules/
- yarn.lock
- package.json
- asset-manifest.json
- .gitignore
- /all the jsx files/
- /all the scripts and styles non minified/
FINAL THOUGHTS
Finally we have created our Divi Plugin. We have seen how to customize an existing Divi module as well as create a brand new one starting from the ‘Create Divi Extension’ tool. The code shown above is partial and is just for example purposes but hope it can be useful to understand some passages on the way to create a Divi Custom Module, wrap it in a plugin and be ready for distributing it.
In the next weeks we deepen the React component of our modules and possibly how to implement also this part for existing customized ones.
Let us know what you think in the comments. See you next post!


Really appreciate your posts on this subject. Being a designer not a developer I have been looking for simpler/shorter ways to extend the Divi modules. Yes I can copy paste your code, but for one simple mod change it is a lot of work for me to apply to other modules (no criticism intended – just my lack of coding knowledge). I was wondering if I could modify the Blurb Module (as an example) with a few lines of code in a child theme (functions.php enqueueing index.js, that loads xx.jsx, then running the two filters) add_filter(‘et_pb_all_fields_unprocessed_et_pb_blurb’, ‘my_function’) and add_filter(‘et_module_shortcode_output’, ‘render_item’, 10,3).
I started trying to add 1 parameter – a margin-bottom (px) slider to the Blurb Icon (its currently a default 30px in css). Merging the array fields worked and I have a UI slider (under Design>Use Icon Size). And I can ‘output’ the CSS (but not for individual blurbs (did try using ET_Builder_Element::set_style – no luck) . Tried to figure the syntax for the The VB side of things but after 2 days of trying have decided to seek help (the only place I can see discussion on the subject is here and a few comments on GitHub). The ET docs don’t even touch on the subject of using this method and show just a basic example in a plugin (and you’ve covered that). It (potentially) seems such a simple way to add one or two extra features to a particular Module so I would love to get this working in a child theme as its only 80 or so lines of code and most of that is the UI field description. Sorry for the long comment.
Hi Paul,
Do you mean that when you set a specific margin for one specific blurb it apply to all the blurbs in your page? Have you used the ‘magic’ “%%order_class” in the ‘selector’ of your ET_Builder_Element::set_style()? It should be something like that:
$defaultMargin = '30px';

$iconMargin = $module->props['icon_margin'];
if ($iconMargin !== $defaultMargin) {
ET_Builder_Element::set_style($render_slug, array(
'selector' => '%%order_class%% .et_pb_main_blurb_image',
'declaration' =>'margin-bottom:' . $iconMargin . ';'
));
}
…concerning the VB side, instead – as we said above in the post -, it is complicated for the moment to make it work properly without creating a Divi Extension/Plugin and a new custom module… the Divi team itself, however, said are working on extending the developers documentation on this topic and as soon as possible we will write also about it and React.
Hope it can be useful for now and thanks for reading… 😉
Hi Dan,
Thanks for getting back – As said I’m a graphic designer and only a part time coder (the odd bit of PHP when the occasional need arises) so forgive my ignorance
Yes, that was one of the problems – tried that – but mine is slightly different. I get .et_pb_blurb_x defined correctly for every blurb in the page CSS (Safari Inspect Page) but also get a .et-pb-icon defined multiple times with different values (which is obviously wrong)
All in all I’m sure I have many things wrong – but I’m trying to learn.
…..Please feel free to remove the code – this is all I have in my Functions PHP…..
'Icon Margin Bottom',
'type' => 'range',
'option_category' => 'configuration' ,
'icon_margin_bottom' => array(
'label' => esc_html__( 'Icon Margin to Bottom', 'et_builder' ),
'type' => 'range',
'option_category' => 'font_option',
'tab_slug' => 'advanced',
'toggle_slug' => 'icon_settings',
'default' => '17px',
'default_unit' => 'px',
'default_on_front'=> '',
'range_settings' => array(
'min' => '0',
'max' => '100',
'step' => '1',
),
'mobile_options' => true,
'depends_show_if' => 'on',
'responsive' => true,
),
'show_if' => array(
'use_icon_font_size' => 'on',
),
//// where in the ui
'toggle_slug' => 'icon_settings',
'tab_slug' => 'advanced',
] ;
[....]
return $output;
}
}
I get the feeling ‘icon_margin_bottom’ => “{$this->main_css_element} .et-pb-icon”, should go in there somewhere?
Maybe I should just stick to designing 😉
That said – if this could be made to work it would make ‘tweaking’ models much simpler
Hi Paul, sorry for the late reply… in your functions there are a lot of duplicated code that cause the problem. Try the following code:
function idaa_add_blurb_settings($fields_unprocessed) {$fields = [];
$fields['icon_margin_bottom'] = [
'label' => esc_html__( 'Icon Margin to Bottom', 'et_builder' ),
'type' => 'range',
'description' => esc_html__( 'Set the Icon Margin to Bottom', 'et_builder' ),
'option_category' => 'configuration' ,
'default' => '17px',
'default_unit' => 'px',
'default_on_front'=> '',
'range_settings' => array(
'min' => '0',
'max' => '100',
'step' => '1',
),
'mobile_options' => true,
'responsive' => true,
'depends_show_if' => 'on',
'show_if' => array(
'use_icon_font_size' => 'on',
),
// where in the ui
'tab_slug' => 'advanced',
'toggle_slug' => 'icon_settings',
];
return array_merge($fields_unprocessed,$fields) ;
}
add_filter('et_pb_all_fields_unprocessed_et_pb_blurb', 'idaa_add_blurb_settings');
function idaa_render_blurb_settings($output, $render_slug, $module) {
if('et_pb_blurb' !== $render_slug) return $output;
$default_icon_margin_bottom = '17px';
$icon_margin_bottom = $module->props['icon_margin_bottom'];
if ($icon_margin_bottom !== $default_icon_margin_bottom) {
ET_Builder_Element::set_style($render_slug, array(
'selector' => '%%order_class%% .et_pb_main_blurb_image',
'declaration' =>'margin-bottom:' . $icon_margin_bottom . ';'
));
}
return $output;
}
add_filter('et_module_shortcode_output', 'idaa_render_blurb_settings', 10, 3);
It should do about what you wanted, i think. Concerning the Advanced Fields and the Custom Css instead the coding process becomes more complicated… i will write on this topic in the next weeks. 😉