
Hi everyone, today we will see a little snippet code in order to add in an integrated way the possibility to upload a Svg logo directly from within your Divi Theme Options panel and customize it just like as any other jpg/png logo.
EDIT FUNCTIONS.PHP AND ALLOW SVG UPLOADING
By default WordPress doesn’t allow you to upload Svg files. So, if you want to upload them in order to use these ones in whatever post or page you want you simply have to add this snippet in the ‘functions.php’ file of your Divi theme (obviously we assume that you are using a child theme):
NOTE: You can obviously use the snippet in order to allow the uploading of every other file type by overriding ‘svg’ with your file extension.
EDIT YOUR HEADER.PHP
However the snippet above give you just the ability to upload a Svg logo in your Media library but you will not be able to animate it linking it to an external Css file; it’s because the Svg logo can’t be reach the outside css if it is put inside an <img> tag as it is in the Divi theme by default.
When you load every page of your Divi website, in fact, the first thing you will see appearing is the Header and the Divi file responsible for that is called just ‘header.php’. This is the file we are going to edit in order to upload a Svg logo properly working with Css animations.
So, first of all let’s create in our Divi child theme a file called ‘header.php’ and paste in it the entire code you will find in the default ‘header.php’ of Divi theme in order to make a perfect copy of the header and edit that one. We have to scroll down till the lines 237 – 244 (these may obviously change a little over the time) and the snippet we are interested in is the <img> tag. Now we have two ways in order to upload our Svg logo.
THE HARD-CODED WAY (NOT RECOMMENDED)
The first way may seem at first sight the easiest one but it doesn’t allow you any flexibility and every time you will need to modify your logo you will have to manually change the url from within the ‘header.php’ file, not really the best solution. Anyway you should just replace the entire <img> tag with the following:
As you can see, doing this way you will have to paste the svg url directly and also the first step (adding the snippet in the ‘functions.php’ in order to upload svg from the backend) is no longer necessary. You will see the logo in place and the only thing you have to do in order to animate it is just create a css file in which you will store the css code and just remember to link the css file path inside of your Svg file, something like this:
THE INTEGRATED WAY (RECOMMENDED)
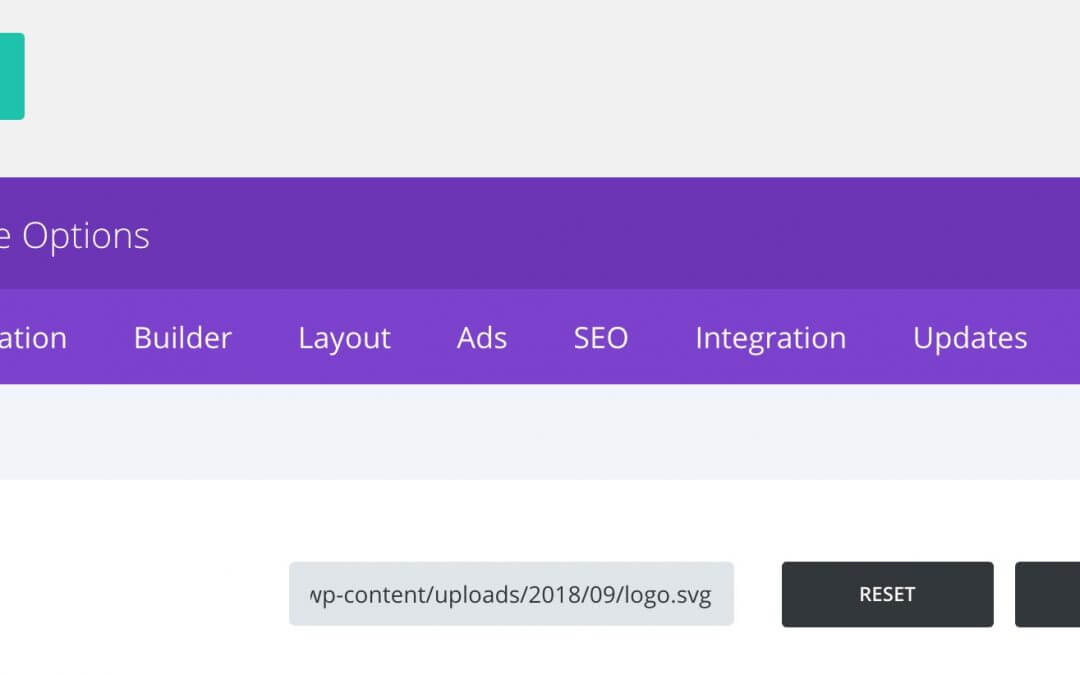
This is the way we recommend if you want to be more flexible and look professional, for example if you are working for a client website and you want to give him the ability to change the logo simply just uploading and selecting it from the Divi Theme Options panel.
So, in this case, after have added the snippet we have seen above in ‘functions.php’, you have to replace the <img> tag of the ‘header.php’ file with the following:
So, just a few more lines of code, it is really easy thanks to the original Divi header code. We keep using the ‘$logo’ variable to use the log selected in Divi Theme Options panel and also the ‘et_get_option’ function in order to apply to it the logo height we can choose in the Theme Customizer.
Just remember to link your Css file also in this case inside of your Svg file and you are on the right way.
AN ALTERNATIVE WAY?
Is there any alternative way to get our result without to modify the ‘header.php’ file? Yes, theoretically you can just add the snippet in the ‘functions.php’ in order to upload a Svg logo from the backend and then upload a Svg file that already have inside the Css needed in a <style> tag. Doing this way you may avoid to edit the header.php but you have to take into account that it requires to apply the css classes directly to the svg elements and that there could be problems with browsers other than Chrome.
FINAL THOUGHTS
We have seen just few and easy snippet in order to make our Divi website even more flexible working with Svg and Css animations. In the next post we will see a real example concerning the animation of a Svg logo.
Stay tuned, see you next post!


