
Welcome again, today we want to talk about a little – maybe not so little – snippet that can be useful if you want make available for download some resources using Bloom and thus let your Subscribers List grows more and more.
So, let’s get started!
In order to reach our goal today we have a couple of ways we can choose from. The first one, a little cleaner and simpler way taking advantage of all the power of Bloom with his last update and Success Action feature; the second one, instead, we’ll involve us in some code snippets in order to add a download button in our post that will be shown only after the Newsletter form has been submitted.
SETTING BLOOM
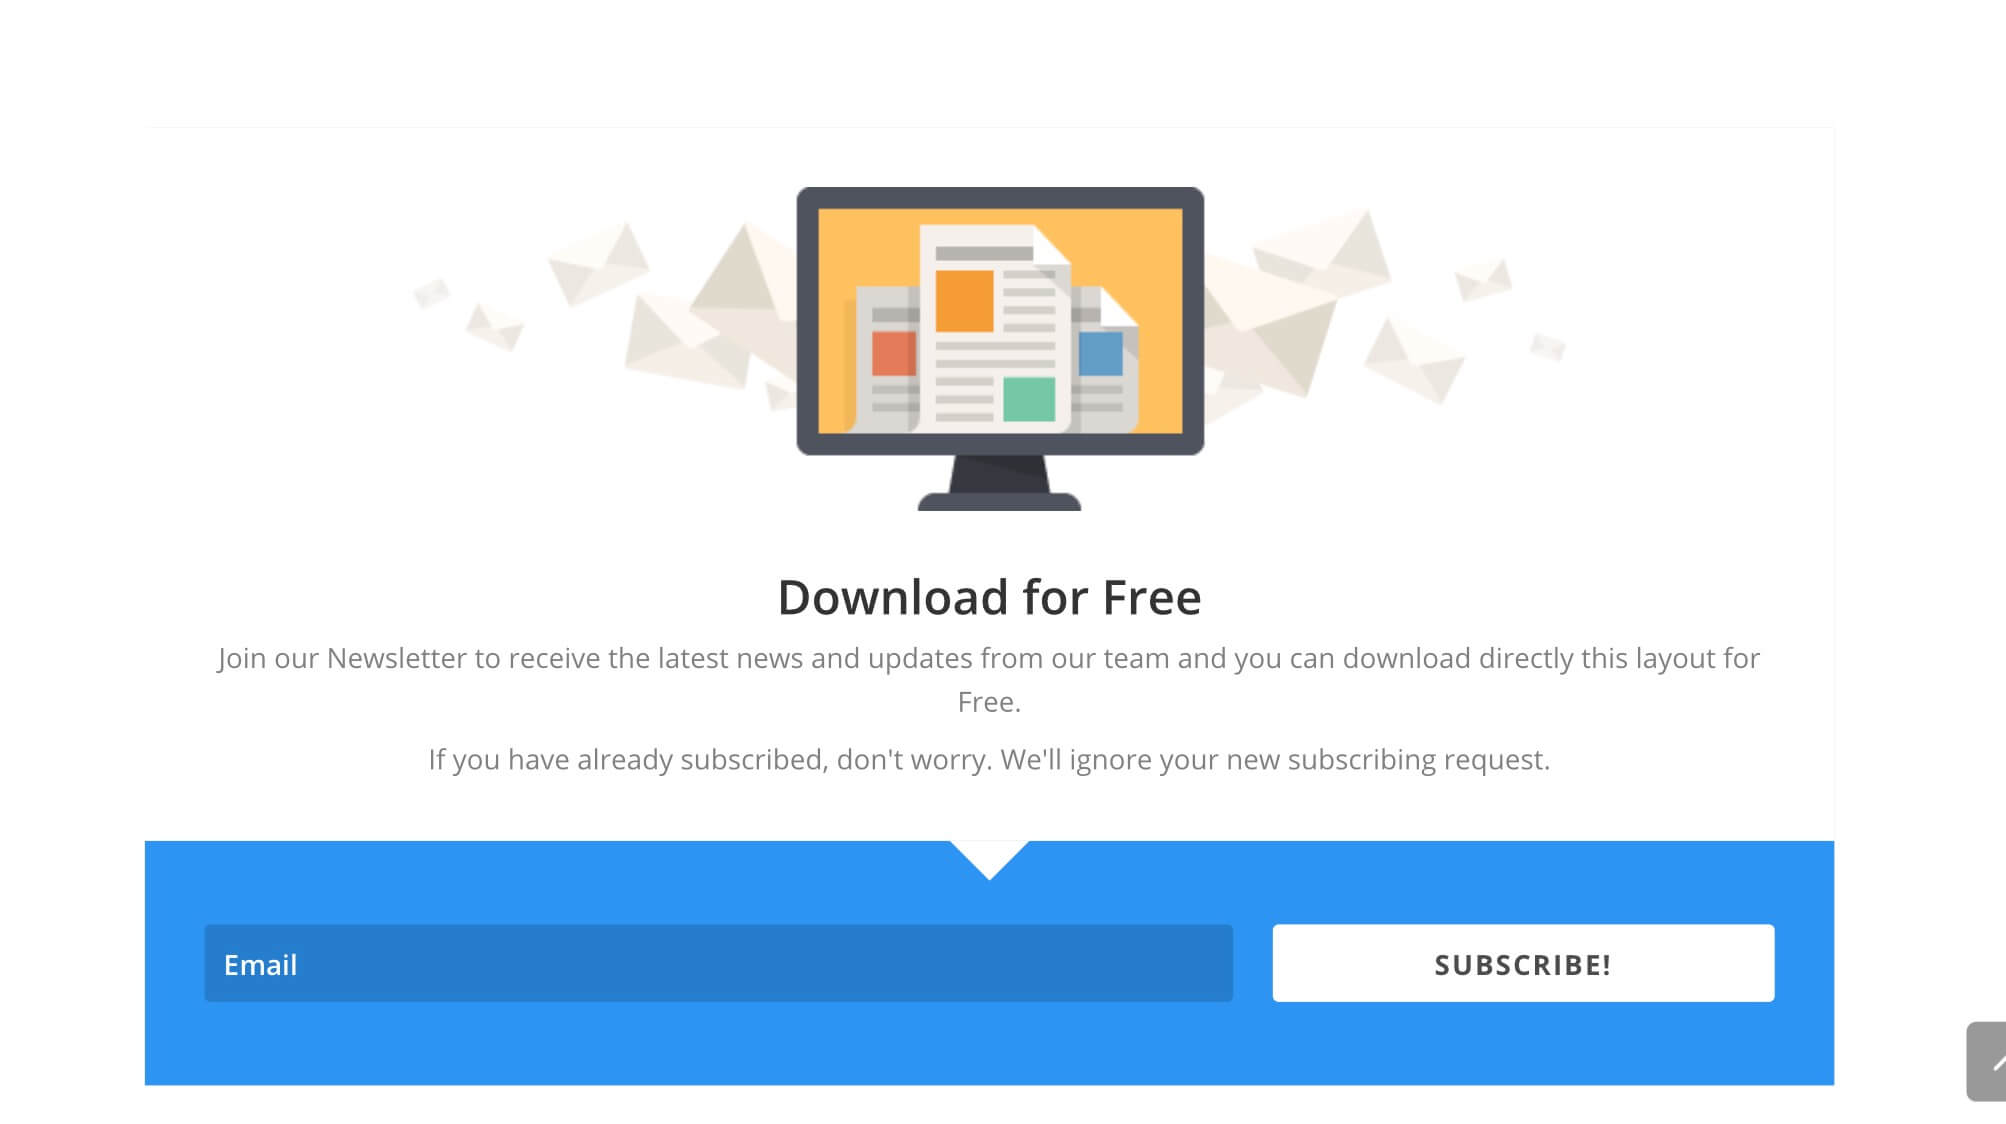
First of all – either we opt for the one way or the other – we have to set up our Bloom form that will register our readers to our Subscriber List. The reward for their subscription will be a Web Design Gift, in our case a free Divi layout .zip formatted.
So we have to go to Bloom menu, create New Optin, select the optin position, an email provider (in our case we opted for the free Mailpoet) for which we already created an account in the Email Accounts submenu, then set the design options (a text to display, an image or a template among those already available in Bloom).
Finally the display settings that let us choose when and how to show our optin (we set up an inline optin that will appear at the bottom of every post we publish just with an email field input and a button to subscribe).
1 – THE BLOOM WAY
Ok, now we’re at a crossroads, taking advantage of Bloom’s new feature Success Action, make our life simpler but lose a bit of creativity and design originality or dirty your hands with some code. Let’s start with the Bloom Way.
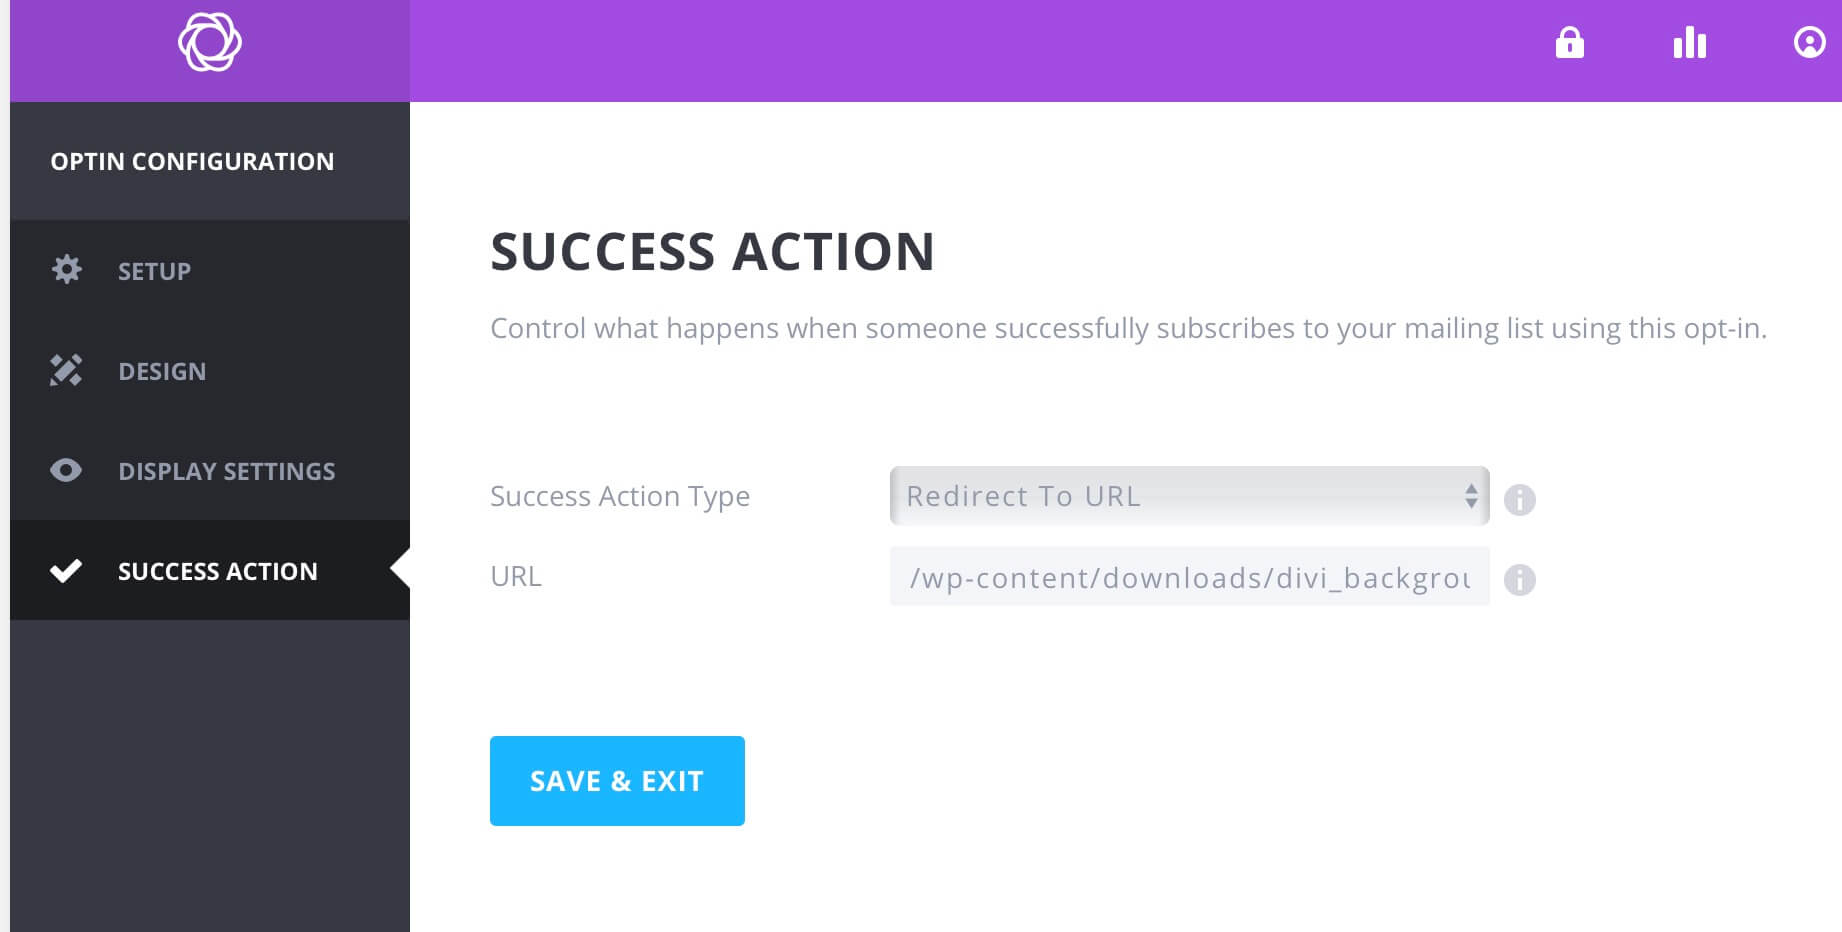
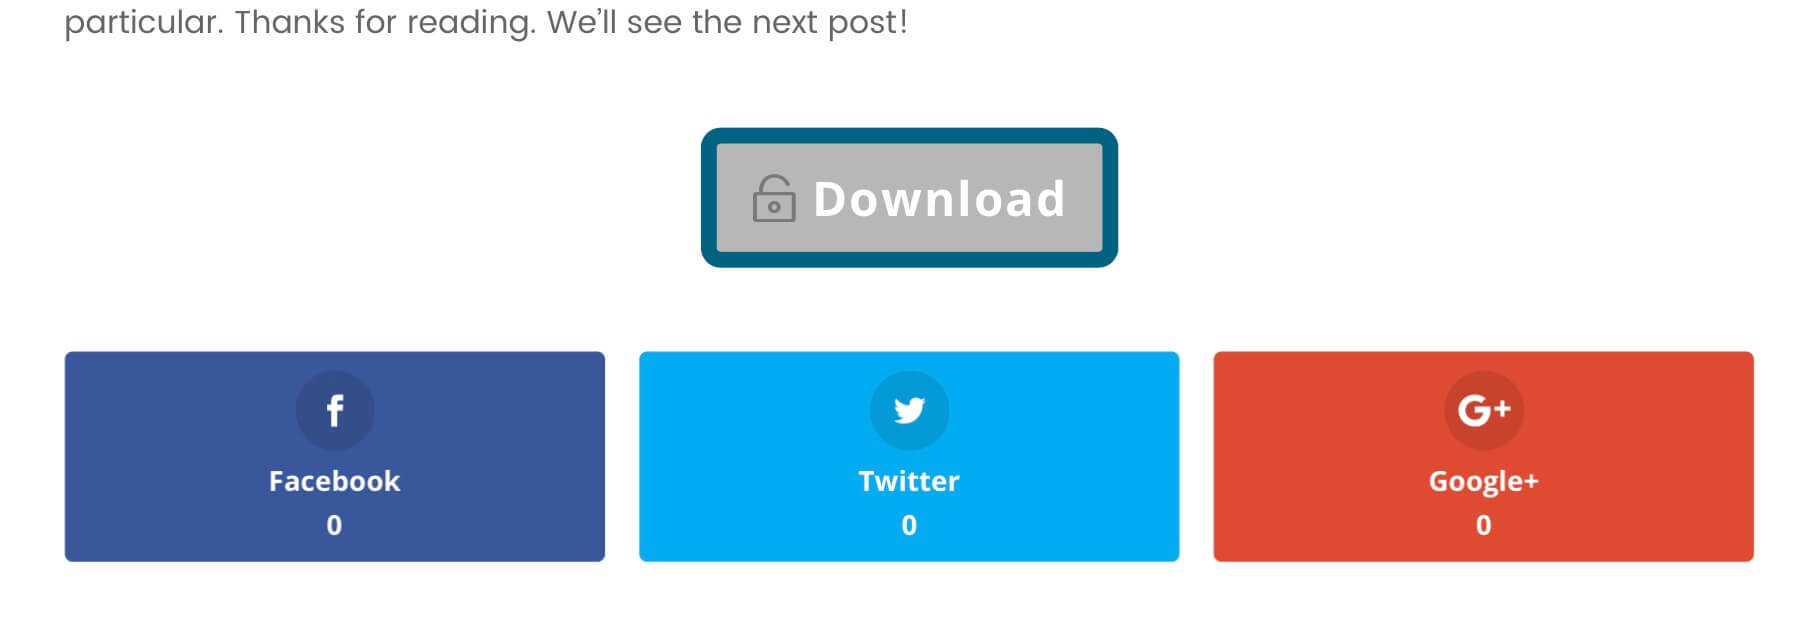
Ok, what we have to do is nothing more than go to Success Action tab, select the Action Type to “Redirect to URL” and type in the URL field the path (absolute or relative) to the file you want to make available for download (in our case we select the path to our “divi_background_layout.zip” that we have copied in “downloads” folder inside the “wp-content” wordpress default folder).
Nothing else, when our reader will put his email and click on “Subscribe” button the download automatically starts and the reader will grab his gift.
However along this way there are some small troubles, the first one we lose the possibility of showing a nice custom success message (but we can easily solve this by setting the message in our Mailpoet or in other provider), the second one and most important is that if the reader has already subscribed to the list the download doesn’t start anymore.
In order to get a better result we have also another Bloom Way more efficient, the Locked Content Optin, but we’ll talk about it in a later post while now we want to show you a more complex solution taking advantage of the jQuery form integration in Divi Theme Options.
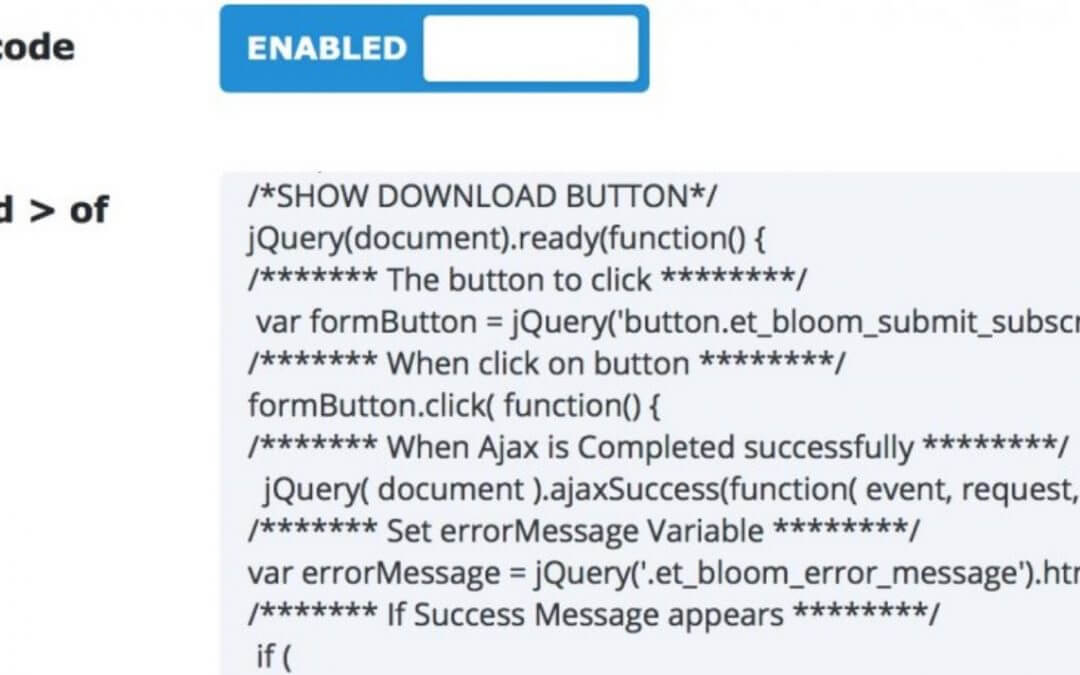
1 – THE jQUERY SNIPPET WAY
Ok here comes into play our jQuery Code Snippet. What we want to do, is just create a Divi direct download Button and show it only after the reader has subscribed (and even though the reader is already our suscriber!). Then we’ll give a look also to the security aspect of this solution.
So let’s begin with our Divi Button!
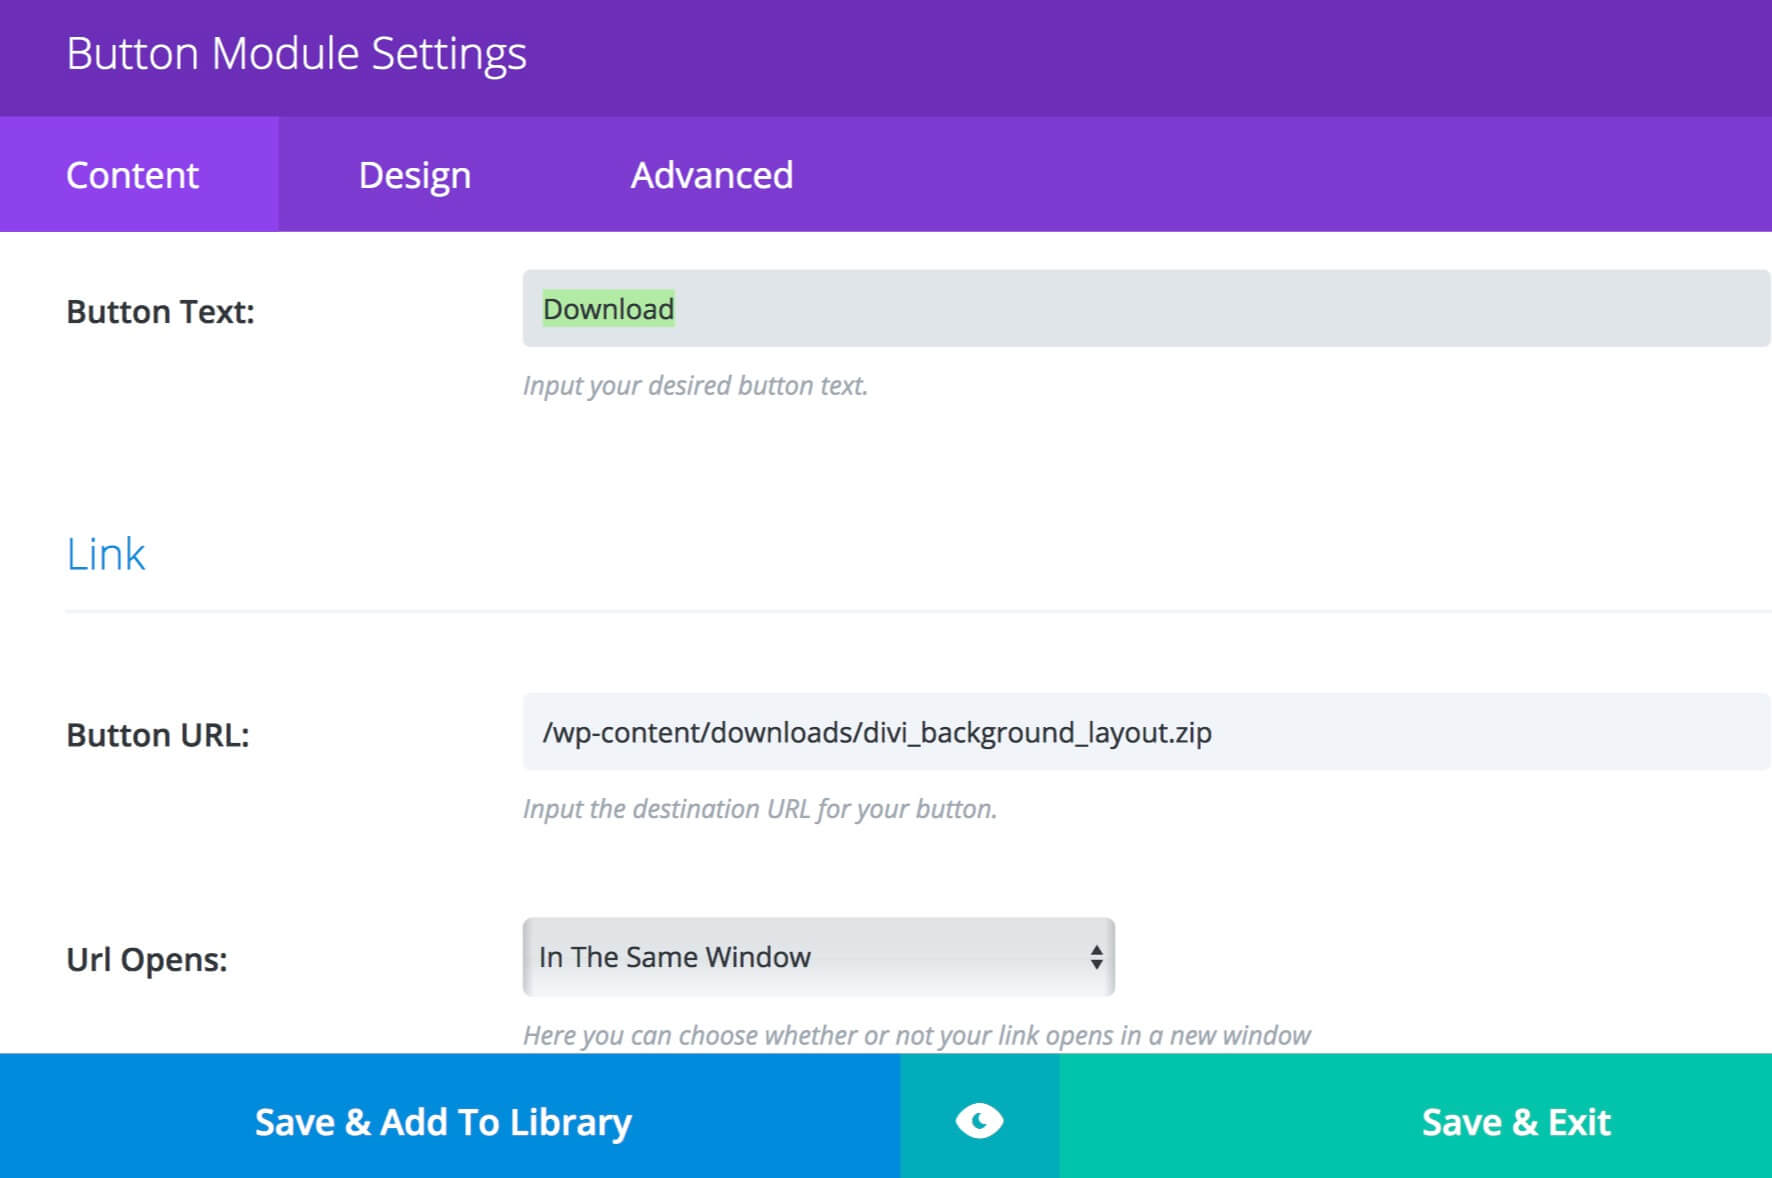
Here we do not want to get too specific about the Divi Button creation and customization (we think we’ll cover this argument in a lot of future posts), Simply we have to add a new Standard Row, then add the Divi Button module, set the text and switch the Custom Design option in order to choose the font, the size, the text and background color and a lot of other graphic elements to our button.
Finally, in Link Button URL field we are going to put our absolute or relative path to the file we want to make downloadable and, last but not least, we have to go in Advanced tab and add as CSS Class: “et-download-button”. Then, before leaving the Divi builder we have to add also a CSS ID to the Row that contains our button (we call the CSS ID “download_layout” but you can choose the name you prefer. P.S. We use it later in our second jQuery snippet).
Now we can go in our Divi Theme Options->Integration and add some pieces of jQuery code in order to get the best result we can.
So, first of all we want to make our Divi Button a direct (single click) download button. We find a clean and simple way in order to do it in our great Elegant Themes Blog (here). So, simply add the code below in “Add code to the
of your blog” textarea.Ok, now every button we will create with CSS Class “et-download-button” will have the ‘Download’ attribute and will starts the download as soon as clicked (even though in our specific case for some reasons we could have done so without it…).
Next we save and scroll a little bottom and copy the code below in “Add code to the top of your posts” (doing this way we’ll save a lot of code load time when loading every page of our website).
There’s no need to explain furthermore the code snippet above. Just copy it taking care to change the ‘#download_layout’ with the CSS ID you chose before and change “#download_layout_after_click” to the ID of a section you prefer to redirect the subscriber (for deep code explanation you can just read the comments you find in the snippet 😉 ).
Ok, all done! Now when the user subscribes to our list the ‘download_layout’ section and the Divi Button will come in sliding from left and at the same time – after the success message we set up in Bloom’s Success Action (or in the email provider) – the reader will be redirect to that section (we have set up a timeout function in order to start the button showing and the redirection after 2500ms); he will click on Download button and the .zip download will starts suddenly.
Final Security Step
Some further consideration we can take about the security of the last solution, the Code Snippet way. The issue, indeed, concerns the path to our downloadable file that could be visible to everyone when inspect the page with Chrome as like as with Firefox inspection tools. So, without subscribe anything someone could inspect, see the url and paste it in the url bar downloading the file.
For this reason we have to take into consideration another piece of code. This time, however, we are dealing with Apache; so we have to open our favorite FTP software and create a .htaccess file into our ‘downloads’ folder (or the folder you chose) and copy the code below changing “howidivit\.com/” with your domain and changing also the RewriteRule so that fits your needs (in our case we prevent direct access via url to all .zip files).
We are now really at the end. That’s all. We hope it might be useful; see you next ‘How i-Divit’ post.


