Today we talk about Divi Animations. The argument, of course, is really wide and in this post we want to cover just a little of it, going to explore how we added a touch of animation to our Divi Blog Card on homepage. Thus, here we are only at Part I of this Divi Animation Series.
The section we are talking about is already interactive on hover, but we want to add also some scrolling interaction.
Divi Animations come already with Divi for some modules ( such as the Image ones ) but we can easily implement the default animation in every other element ( module, row or section ). The most recent and reliable guide to Divi Animations is without dubt here on Elegant Themes Blog and to this we refer for further details.
Here we are merely explaining step by step how we animated our section.
So, let’s get started!
ANIMATE THE SECTION
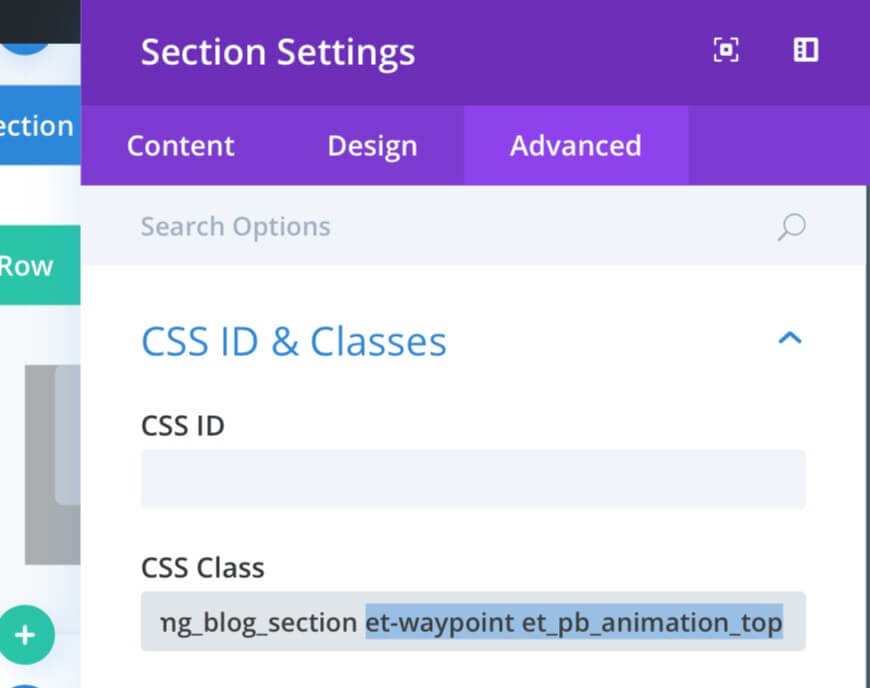
This first step is really really simple. We have just to add a couple of class to our section!

The first Css class we have to add is ‘et-waypoint’, this class simply create the base for animation hiding the element selected from the view. Then we add another class: ‘et_pb_animation_top’ – one of the default Divi Animations – that will make the section appear sliding from top when the section itself come into the user view.
ANIMATE THE BLOG IMAGE
This second Divi Animation is a bit more complicated and require some Css and jQuery code in order to achieve it. First of all we have to go into the Advanced tab of blog module and add ‘featured_img’ as Css ID.
Next step is go into Divi Theme Options -> General -> Custom Css and create our custom animation taking advantage of animation css property.
Finally, we go into Divi Theme Options -> Integration -> Add code to the <head> of your blog and we add the following jQuery; it will add the css class we have just created when we scroll till 40% of page view.
All done. Now we’ll see our section appearing from top when it comes into view. Then the featured image on the left will be animated with a flipping effect and a shadow one when scrolling till 40%.
See you next post!


