
Welcome to our second Divi Hooks Series post. In the first post after introducing the hooks, what they are and how to use them, we have focused on two WordPress and Divi hooks: ‘admin_notices’ and ‘epanel_render_maintabs‘.
Today, we want to deep the ‘admin_notices’ hook by focusing on a very frequent problem that plugin developers may encounter. How to let the user dismiss your notice permanently.
We will move then to the Divi-specific hook : ‘et_epanel_tab_names’. About this one, however we’ll talk cursirly cause we publish a dedicated post on it next tuesday.
1) admin_notices AND HOW TO DISMISS THEM PERMANENTLY
For our and your ease we take up the subject and show below how our custom notice (the info blue one) looks and the code in order to create it.
We took the example from the code of our plugin i-Divi Post Settings, however with the code above if you click on the dismiss button on the right (created by using the css class ‘is-dismissible’) the notice disappears correctly but reloading the page or moving to another one the notice promptly reappears and this behaviour can be tremendously annoying for the user.
So you have two ways in order to let the user to dismiss it permanently: you can transform the dismiss button in a definitely dismiss one or also add another button/link beside your text for dismissing the notice permanently and leave the default dismiss one for closing it temporarily. Anyway the code behind the scenes is quite the same. Let’s see it together.
USING THE DISMISS BUTTON
Let’s start from the first way (the same we chose for our Divi Post Settings plugin). What we have to do in a nutshell is quite simple: when a user clicks on the dismiss button we want to save a value in our database (let’s say the value ‘dismissed’) and then for that specific user we want to check if that value is present in the database everytime he/she reloads or moves to another page, so that we will show our notice only if the value there is not (that is, if that user had not clicked the button).
In order to do it we will take advantage of Ajax and there are four steps between us and the final result:
1 – Create an Ajax function
So, first of all we are going to add a js file (we place this in ‘js’ folder inside the ‘admin’ one and we call it ‘idivi-ajax.php’) in which we write our ajax function. The ajax entire process might seem a bit complicated but essentially we are saying to the plugin: when a user clicks on the button selected by the classes ‘idivi-notice’ and ‘is-dismissible’ we want to execute a php function that we are going to write in the second step.
2 – Create a Php callback function and enqueue the ajax script
Ok, now we can create our php function for processing the ajax in which we will retrieve the current user id and then we add/update the value ‘dismissed’ for the ‘idivi-dismiss’ option for that specific user.
Of course we have also to enqueue our js file in the php one; so we add the following code:
Note that you have also to localize the script creating a nonce; this is a series of numbers and letters used from WordPress for security reasons. The question is complex enough and we will return on it in a future post but if you want to deep the subject see here.
3 – Edit our main function
Finally we are going to check in our original function if the user clicked or not: so we retrieve the user id, we store in a variable ‘$idivi-dismiss’ the value stored in the database for the option ‘idivi-dismiss’ (obviously for that specific user) we created before and we wrap our notice code in an ‘if statement’ that checks that the ‘idivi-dismiss’ value is not equal to ‘dismissed’.
4 – Delete the value if the user deactivate/delete the plugin
As last step we want also to ensure that the value stored in the database will be deleted once the user deactivate the plugin:
2) et_epanel_tab_names
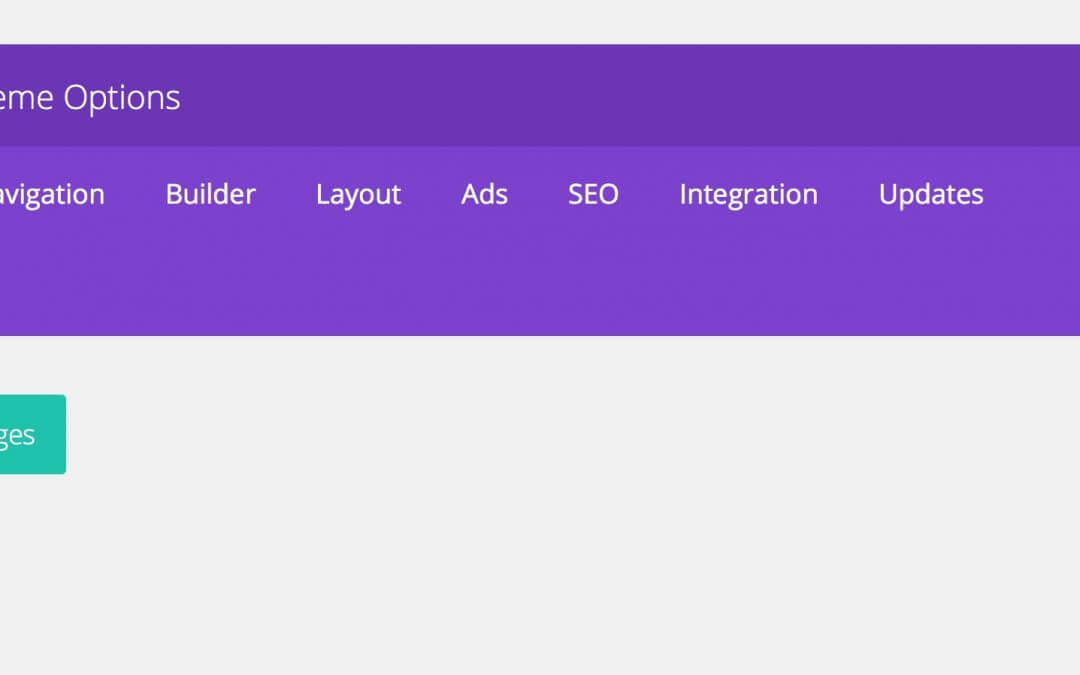
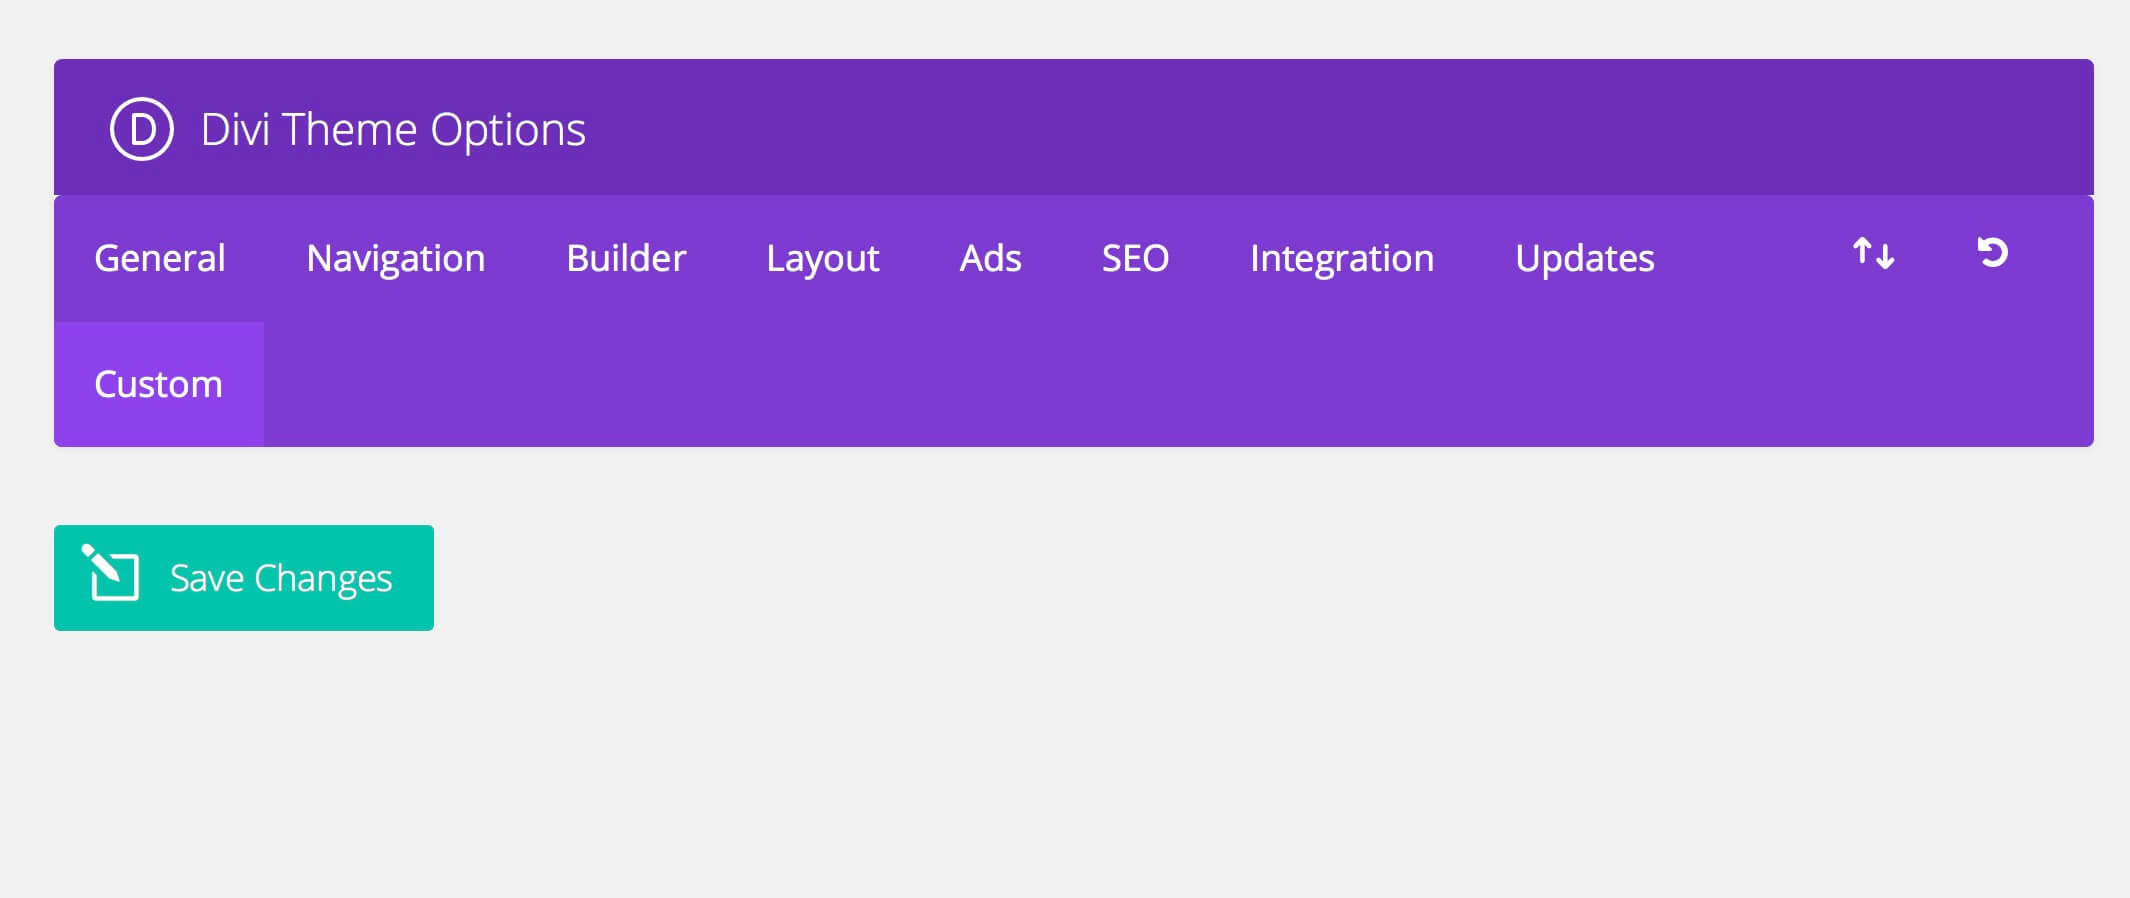
We have already seen how to add a new tab using the ‘epanel_render_maintabs’ action. Today we want to focus on a filter that let us to do the same thing in a more robust way in order to add also new options in the new tab.
The filter is ‘et_epanel_tab_names’, so if you want to append a new tab after the Updates one you have to add in your functions.php the following code:
this way we will see a new ‘Custom’ tab; however in order to place under this new tab a new set of options we have to write a lot of further code customizations and, as we said, we will see these ones in another post.
FINAL THOUGHTS
We continue our tour among the hooks of WordPress and Divi. We’ll meet you in a month for another post on these wonderful tools WordPress give us to develop and customize our themes and plugins.
See you next post. Cheers.


