

Hi everyone, today we will talk about Shadows in Css and in Divi. Just a brief introduction to the box-shadow Css property and then we will see all the Divi power in creating stunning effects with multiple shadows.
So, let’s get started!
CSS SHADOWS
The times when the screen was flat and two-dimensional are gone. Today every modern website plays around with shadows and other css property in order to give the user a perspective and three-dimensional view.
Nowadays we can easily add shadow for example to our texts using the ‘text-shadow’ property; however the most used Css property is definitely the ‘box-shadow’. It’s a very simple property but with high margin of customization.
box-shadow
This is the syntax of the ‘box-shadow’ css property:
NOTE that an interesting feature of the ‘box-shadow’ property is that you can add multiple shadows by separating your values by a comma, just like in the example below:
So, in order to give a real example, let’s say we have an image, we will give it a simple shadow as follows:

SHADOWS IN DIVI
Ok, when working in Divi – as we are always used to – things get even simpler! You just have to add your image module, go to the Design settings and scroll down to the Box Shadow toggle: here we can set our X and Y offset values, the blur and spread radius, and the shadow color of course.
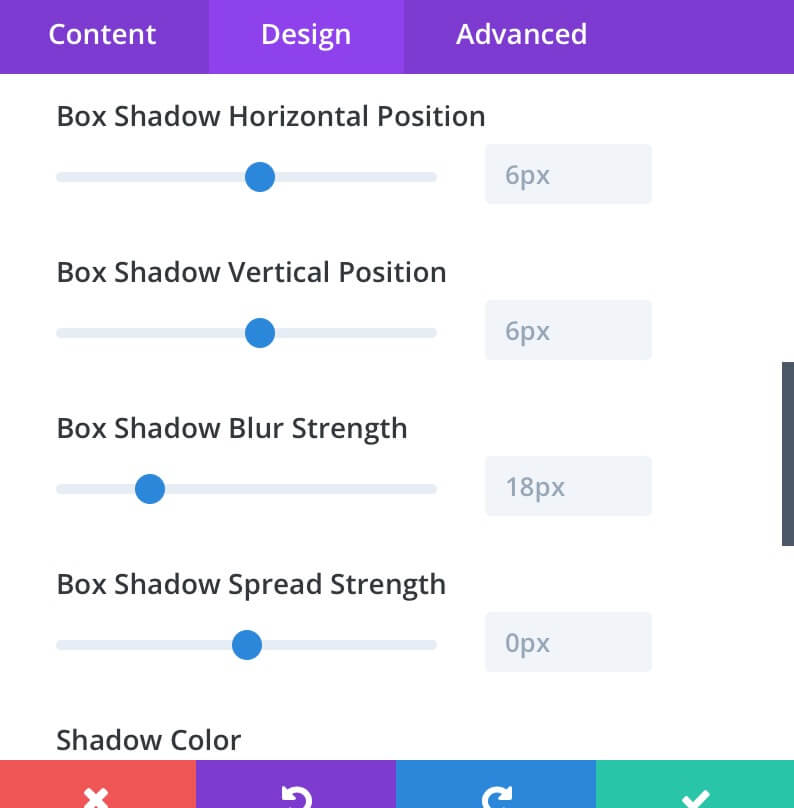
So, we can reply easily the box shadow values we set with css just with a couple of Divi options.
MULTIPLE SHADOWS
Till now we covered just the basics; however with Divi we can get much more complex results. Let’ give a look at an example.
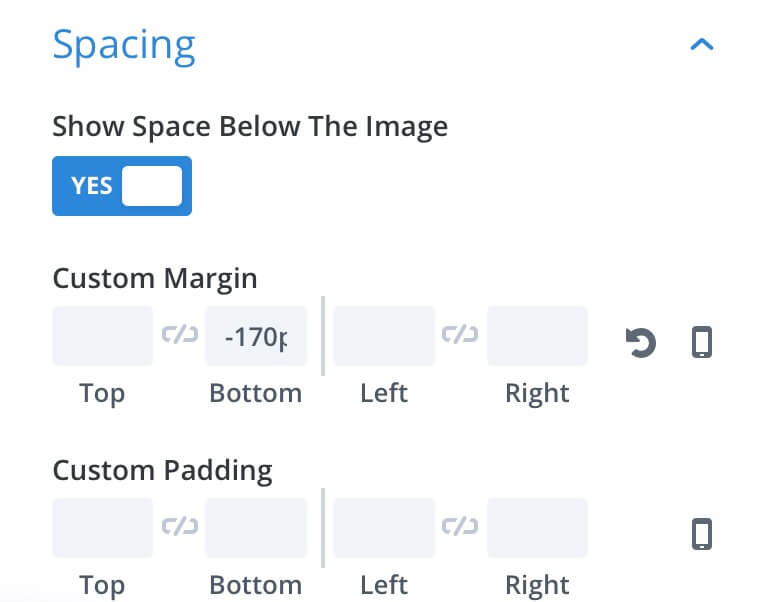
Let’s say we want to add a two-colour shadow below our image. We just have to create a row and add an Image module inside of it. Then we scroll a bit down and add another row choosing a two-column structure; we go to row settings -> Design and customize our gutter width to the value ‘1’. Finally we have to add two text modules inside our row and give them a padding value of 15%, both top and bottom.

Now we just have to move down our image bringing it above our text modules; in order to do it we can work with margin options… so we will set in our image module a bottom margin of ‘-170px’ (of course the value may be different in your case) .
Finally we have to add our shadows, so we go to our first text module settings -> Design -> Box Shadow and configure a shadow with the following values:
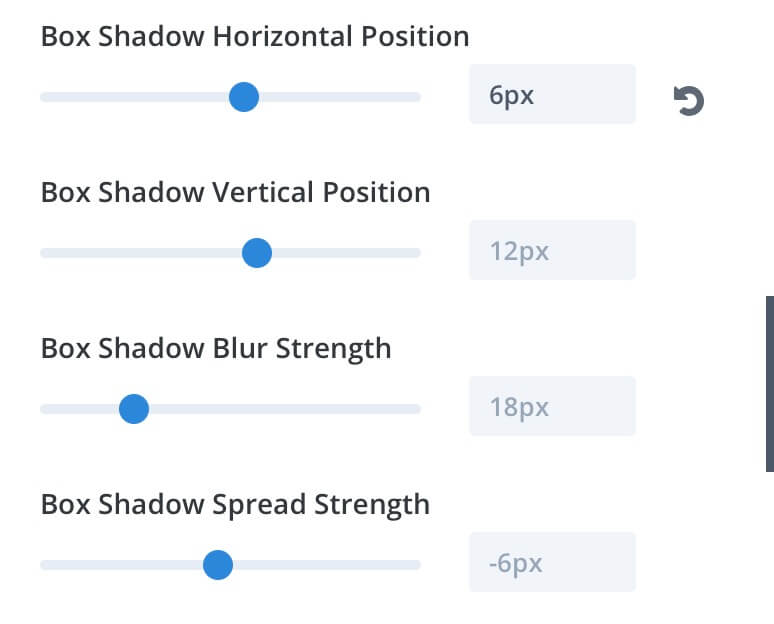
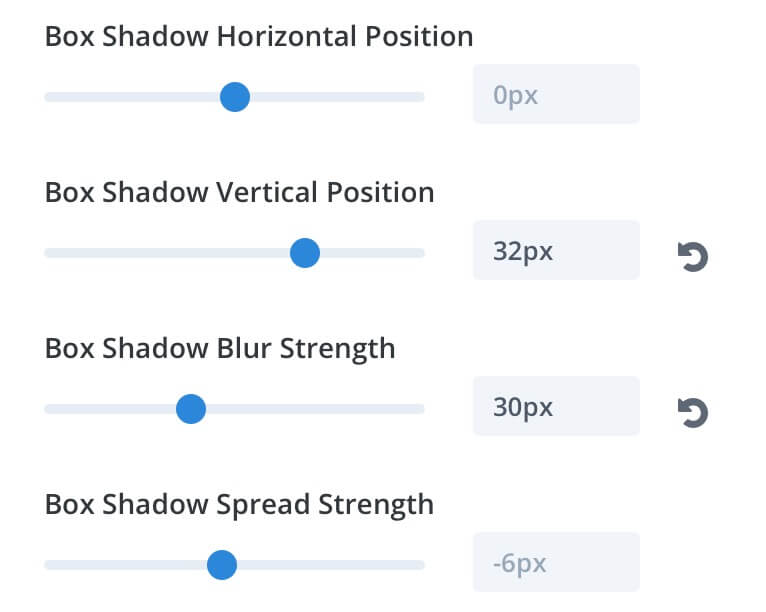
We can simply replicate our settings for the second text module just changing the Box Shadow Horizontal Position to ‘-6px’ and then we assign two different colors: rgba(12,113,195,0.45) and rgba(201,38,141,0.45) respectively. As the last step we go to our Image settings -> Design -> Box Shadow and we set a shadow as follows leaving the default dark color:
Our final result will be something like this:
FINAL THOUGHTS
You can obviously try as you want to mix modules and shadows in order to get your desired result; here we just give a simple example. As always do, we recommend you to do not overdo it with shadow effects and try to give your design a shadow as realistic as possible.
See you next post.
Cheers


