
Hi everyone, today we are going to introduce you the update (v. 1.1) about our “i-Divi Post Settings ” WordPress plugin and how we practically update the plugin in the WordPress directory thanks to SVN command line by the Terminal.
This will be a two posts mini-series plus a bonus one in which we will show you how we can update our WordPress plugin in the directory right by updating it on Github using a shell script to communicate the updates to the WordPress repository. This last post, howewer, will follow another two posts mini-series on Git and Github.
So, let’s start!
UPDATE CONTENTS
Few days ago we updated our “i-Divi Post Settings” plugin to the version 1.1. This was our first update of the plugin and for its orginal concept this will be probably the major one. So, we are going to show you quickly the most significative changes we did to the plugin.
ADD ICON IMAGE TO THE PLUGIN
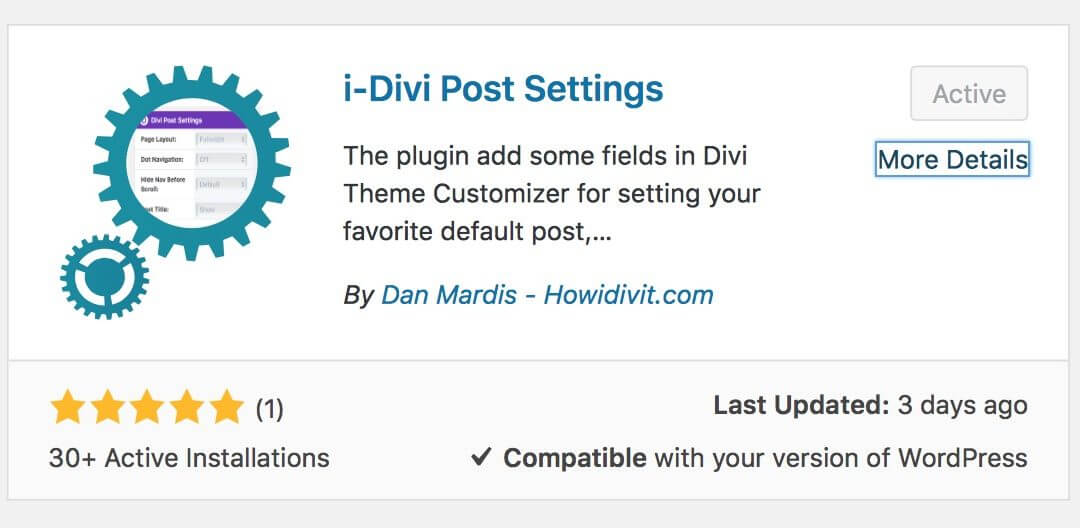
In our initial plugin release we forgot to add in the assets folder an icon image. We added a ‘banner’ but not an ‘icon’ one. This was a blue pen error cause WordPress takes the ‘icon’ image and shows it to the users as the icon of the plugin visible on searching and browsing the directory. It means that lacking it your plugin (this way was also for our plugin!) will end up being confused among the thousands of plugins that lacks icon and got one simple and colorful background in place of it.
The first step is to create the design and save it as png (or jpg) with dimensions of 128x128 (you can also add a svg icon in addition to the png one); then you have to name the file: “icon-128x128.png” (and “icon.svg” for the svg one) like WordPress itself says.
Now when you search for our plugin you will see something like this
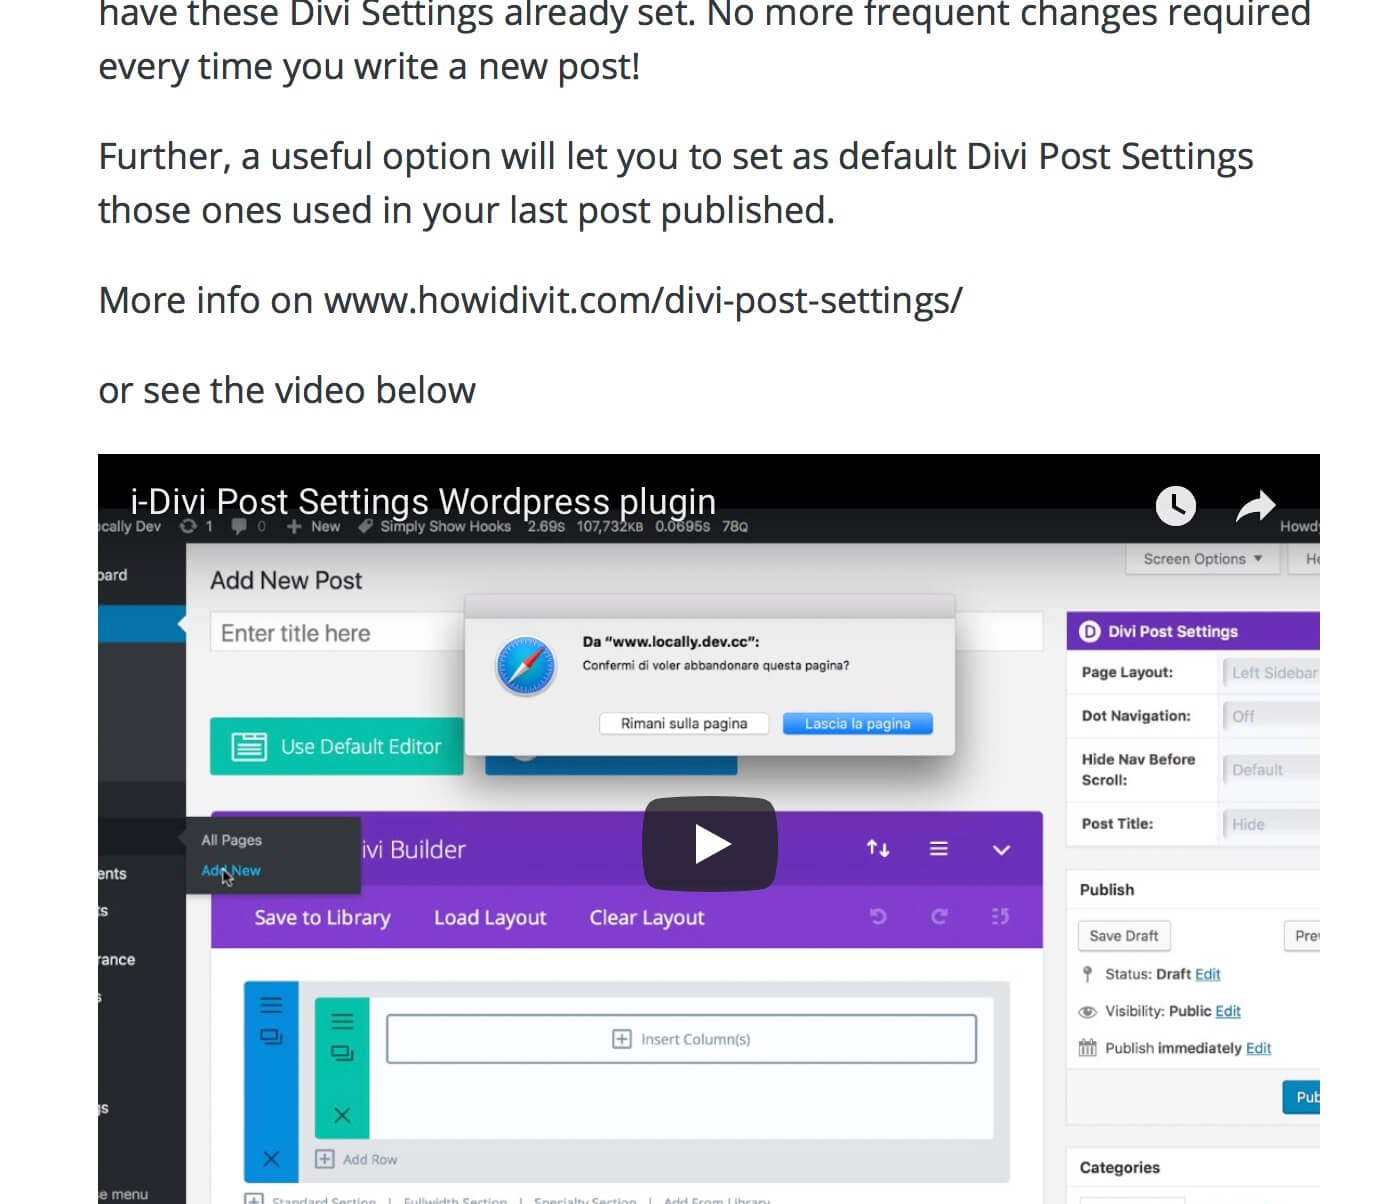
ADD YOUTUBE VIDEO IN THE README.txt
Another little change that can give your plugin more visibility and reliability is adding a short intro video in the readme.txt file in a way that it is shown in the directory just below the plugin description. So we have to add the following line in the readme file:
[youtube https://youtu.be/7PmRNIgBFlY]
Now in the WordPress directory we will see the video preview:
ADD A LINK TO THE CUSTOMIZER ON ACTIVATING THE PLUGIN
We pass now to the plugin. The first thing we add is a link to the Theme Customizer in the info notice that appears when the user activate the plugin. In order to do it we simply edited our notice text adding a link to the words “to the Theme Customizer”.
However the link to redirect to was not so obvoius. We opted for redirecting the user directly inside of Blog Panel so that would be soon visible the custom settings added by the plugin. In order to do it we used the ‘autofocus’ functionality that let you not only to redirect to the Customizer with something like ‘href=”customize.php”‘ but also to link directly panels, sections and controls. In our case we add: ‘href=”customize.php?autofocus[panel]=et_divi_blog_settings“‘.
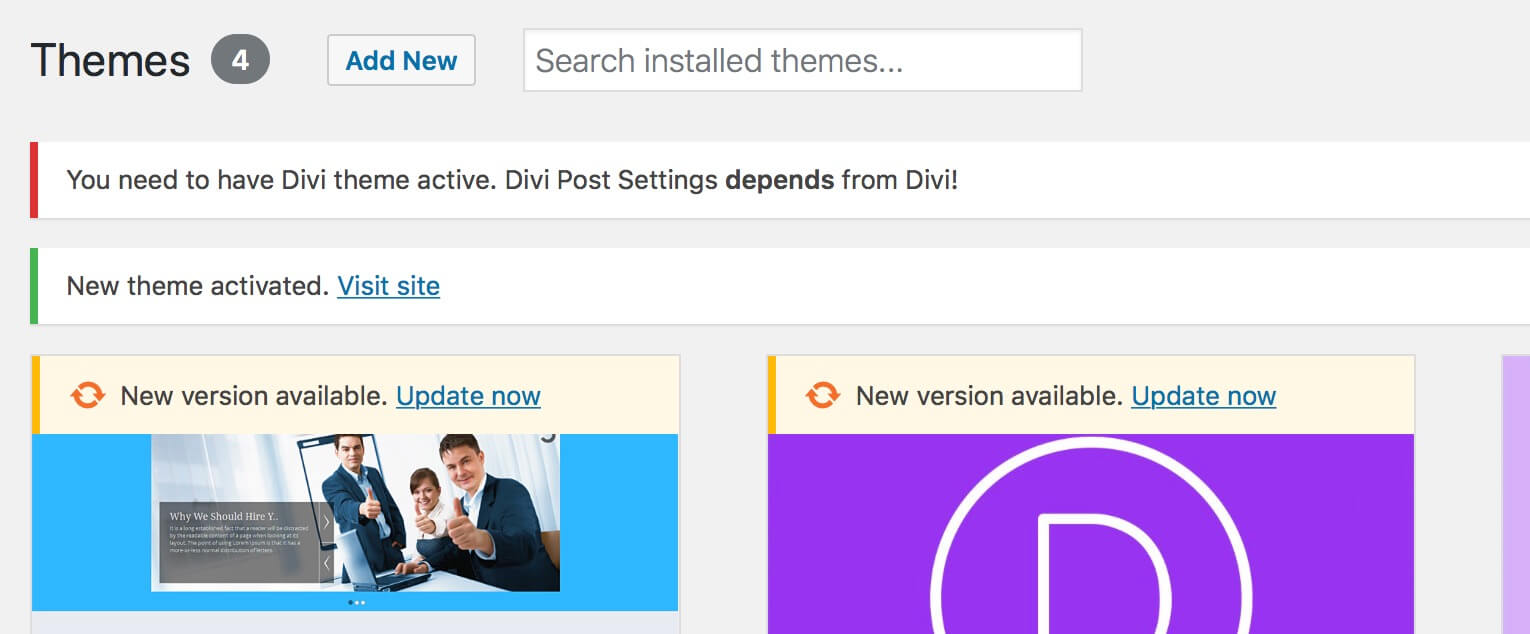
IMPLEMENT DIVI SETTINGS ALSO FOR PAGES AND PROJECTS
The major change for the plugin, however, is certainly the implementation of the Divi Settings also for Divi pages and projects. So we add in the Theme Customizer two sections (‘Divi Page Settings’ and ‘Divi Project Settings’) under the Blog panel from which the user can set the default values.
The code implementation is very similar to that already written. We simply wrap our code blocks in some ‘if…statements’ to check if are pages, posts or projects, recover the values set in the Theme Customizer by the user and modify a little the options according to the Divi ones (so for example we have a different option called “Project Navigation” for the projects or we don’t have a “Show Title” option for the pages). So for example we compare below the code concerning the “Dot Navigation” we use in version 1.0 and that one of the last 1.1 version:
/* V. 1.0 */
/* V. 1.1 */
We implement also the “Remember Last Used Options” option for Divi Pages and Projects and of course we update also the ‘Uninstall’ code in a way that deleting the plugin all the values would be deleted.
FIXED MINOR ISSUES
Being the first update from the initial launch of the plugin fixing some minor issues was almost inevitable. In particular we noticed that if you activated the plugin being on Divi theme and at a later time you changed the WordPress theme (let’s say from Divi to Twenty Seventeen for example) you got a fatal error because WordPress called an undefined function.
We identify the problem with our ‘divi_theme_is_active()’ function; so we join this function inside the ‘inform_user()’ one in a way that now if you change your theme after you activated the plugin no white screen of death appears but only an error notice informing you that without Divi theme activated the plugin doesn’t work.
Furthermore we fix also a couple of warnings concerning our ‘idivi_post_settings_Admin()’ class call (inside our main function ‘idivi_single_settings_meta_box($post)’) in which we forgot the $plugin_name and $version parameters.
BETTER ORGANIZED AND COMMENTED CODE
Finally we re-organize some pieces of code and re-write it in a better way. A classic example is the ‘inform_user()’ function we talked about above. Instead of having two different functions, one for check if Divi is active, another for redirecting the user to the Theme Customizer once he activate the plugin, now we have one single function that accomplishes these two tasks at the same time:
We also re-write the comments of some functions taking advantage of the PHPDoc and in particular of ‘@since’ parameter in order to make more readable and clear the version changes for us and for everyone will put hands on the code. We will deep this php ‘commenting code’ topic in a future post, for now if you want to know more about it we refer you to the documentation of PhpDocumentor.
IN THE NEXT POST…
Ok, we covered all the major changes we made to our i-Divi Post Settings plugin. Next tuesday we will show you step by step how we update concretely the plugin in the WordPress repository using SVN commands on Terminal.
Cheers!


