
SUGGESTED POSTS
The following article assumes you have already read the articles on the side. Take a look!
Hi everyone, today we will see in a real example how to work with React States when developing a new custom Divi module.
So, let’s get started!
A SNEAKPEEK
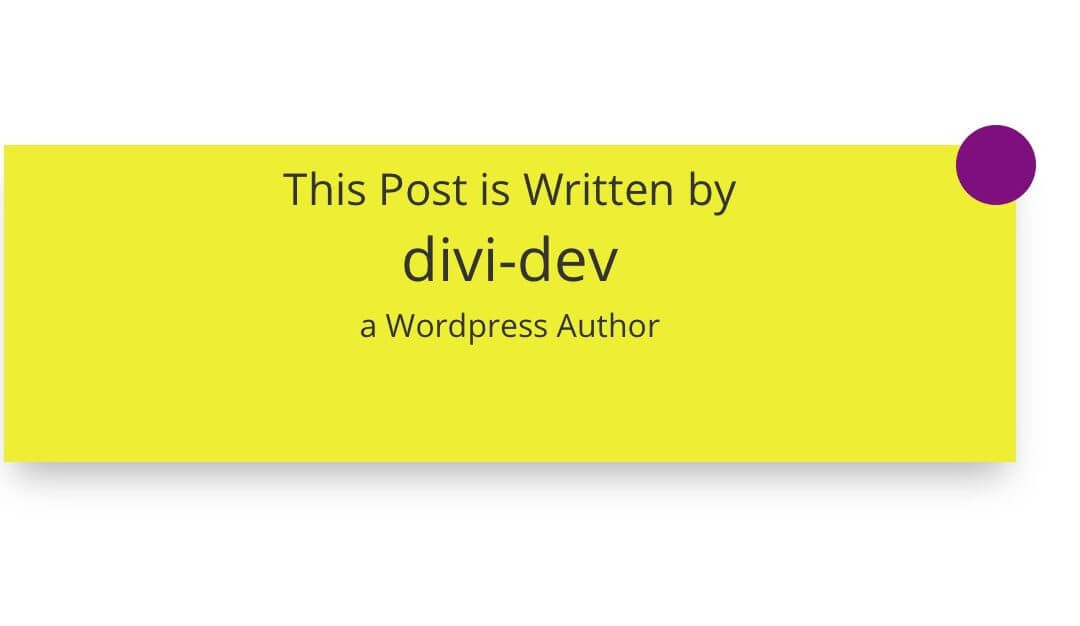
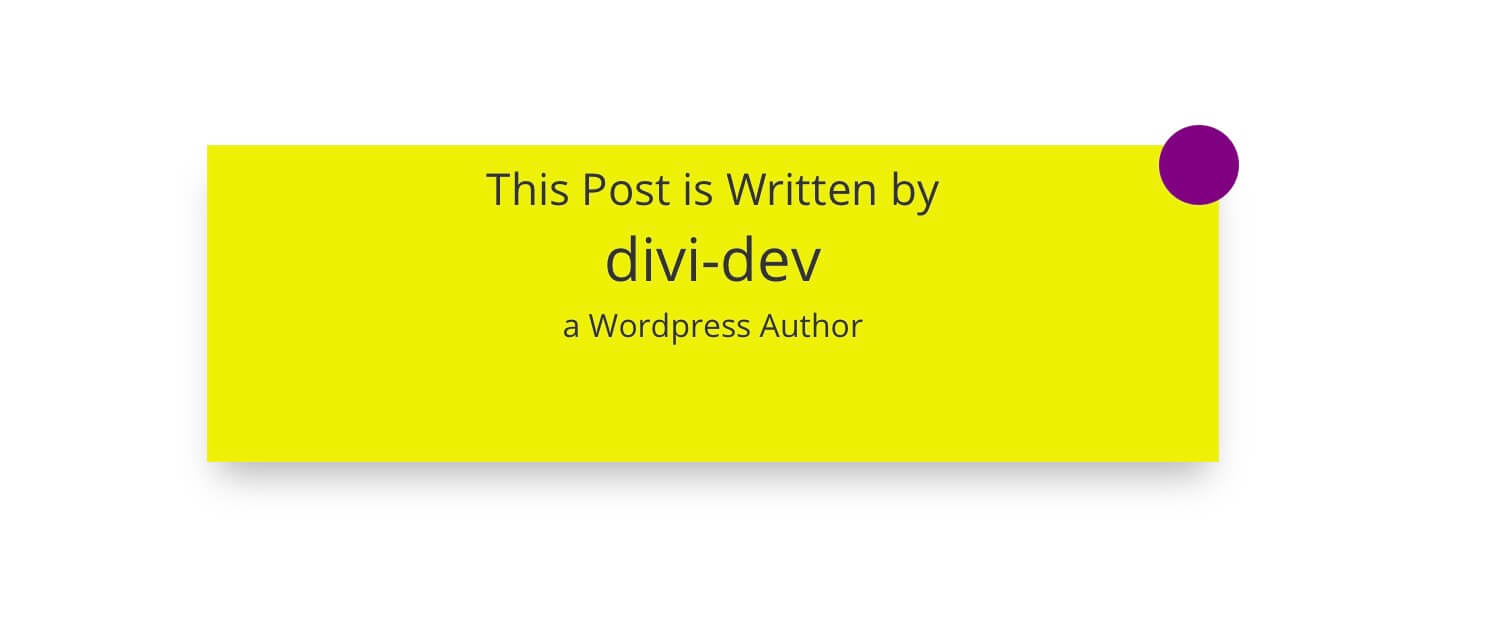
Our goal is simple enough: we want to create a custom module similar to a card in which will appear the post author and some text to introduce him; we also want to add in our Visual Builder (and only in it!) a purple circle at the top left of your module. We will develop this circle in the next React series posts but for now we want just to make its border transparent by default and then according to the module background color.
REACT STATE EXAMPLE ONE: Ajax call and Divi Loader
So, first of all, let’s say we have to make an ajax request for getting the post author. We can simply do that in our main php file writing a ‘standard’ php function and hooking it with ‘wp_ajax_nopriv_’ action:
For our purpose we just take the default custom module added by the ‘Create Divi Extension’ tool; before we can divi into the React component, however we have to make some adjustment also in our custom module folder and php file.
So first of all let’s rename our folder from ‘SimpleHeader’ to ‘AuthorCard’, accordingly we have to rename our .jsx and .php file inside the folder and then, moving to the ‘index.js’ file, override all the occurrences of ‘SimpleHeader’ with ‘AuthorCard’.
As final step we enter our .php and .jsx files and also here we override ‘SIMP_SimpleHeader extends…’ with ‘AC_AuthorCard extends…’ and then accordingly the slug and the class name at the bottom of the file; we move then to the .jsx one and again we have to update the class name (twice) and the module slug.
Now that we have our ajax function set up and our custom module properly renamed we have to move on on our custom module .jsx file. By default here we have just the React component with a simple ‘render()’ method inside.
We also added a couple of fields (Author Intro and Author Desc) in our php. file (do you remember how to add custom fields to our module?) for adding some text before and after the author name and we can customize it as we prefer.
To declare a state we have two ways, we can declare it inside the class directly this way:
However we chose for a better organization to use a constructor method in our component in which we can store our state using ‘this.state’, for our purpose we want to declare an ‘author’ state = to ‘Howidivit’:
If we add now our Author Card module in the Visual Builder we will see something like this:

We can pass now to fetch our data thanks to our ajax function called directly inside our lifecycle ‘componentDidMount’ (we will come back on the Lifecycle hooks in the next week!):
NOTE we append to the ‘body'(a FormData) the action of our ajax function and the current post id thanks to the WordPress ‘window’ object!
Ok, now we can enter the Visual Builder, add our Author Card module and we will see after a second the current author post appearing.
However let’s say we want to show the original Divi loader while our ajax call is loading; really very easy, just add a state for it (we will call it ‘isLoading’ and give it a value of ‘false’), change it to ‘true’ using ‘this.setState’ inside our ‘componentDidMount’ when the ajax call is completed and finally add in the render() method the very simple html for the loader wrapped in an ‘If…else’ statement for checking that the ‘isLoading’ value would be ‘false’.
REACT STATE EXAMPLE TWO: Background Color Circle
We have already seen how React states can be useful in our Divi development workflow. Let’s move further with preparing the ground for next React series posts. Let’s suppose we want to add background color circle to the top left of our custom module; it will have a purple background and a border by default transparent. However we want give the border the same color of our module background if it is set up.
Again, we can set our background color as a state in our constructor:
Then we simply declare in our render() method a constant named ‘style’ with stored inside our border values included the border color grabbing it from our state, we add a span element and give it as style property our constant ‘style’:
All done. We used another state for our purpose and we see in the next appointments how to develop it. The last thing we have to do is just styling a little our Background Color circle in the style.css file inside our ‘AuthorCard’ folder:
FINAL CODE AND FINAL THOUGHTS
Ok, let’s recap our React code in the jsx file, it should be something like this:
Next week we will talk about Lifecycle hooks like ‘componentDidMount’, ‘componentWillMount’, ‘componentWillReceiveProps’ and so on giving then a real example applied to our custom Divi module Author Card.
So, stay tuned. See you next post!


